Facebook recently announced the launch of the Facebook Attribution Tool, a free tool “designed to give marketers a more holistic view of the customer journey, both on and off Facebook.”
A couple of things…
1. This tool is DEEP. Have fun poking around this Facebook Business help guide to learn all of the ins and outs of the Facebook Attribution Tool.
2. I just got access to this thing for the first time, too. I’m still learning it. I’m still discovering its value.
Bottom line? There’s a lot to discuss here. There’s a lot that can’t be put into this single post. And, quite frankly, I’m just discovering everything that can be done with it, too.
But, if you’ll scroll to the bottom and back up, you’ll see just how dense this post is. And it’s simply an introduction to the tool — how to set it up and what it’s for, at least at a top level.
There’s so much more we’ll need to discuss about this in the coming weeks and months. But for now, let’s get to know this tool better. And if you haven’t set it up yet, let’s do that, too!
What Is the Facebook Attribution Tool?
In the simplest terms, think of it like this… When discussing attribution — or in this case, Facebook attribution — we’re looking to determine the cause of a conversion. Where did someone come from? What device were they on? Did they access multiple devices? Was the content organic or paid?
You may have heard of Atlas, which provided valuable cross-platform and cross-device information to the biggest of brands. Atlas has now been repurposed in the form of the Facebook Attribution Tool, and it’s available to all advertisers.
Facebook Attribution is designed to help you understand the impact of your content and ads across multiple publishers, channels, and devices. Note that this includes and goes beyond Facebook — not only the organic referrals from Google and others, but your non-Facebook advertising efforts.
Set It Up: Get Started
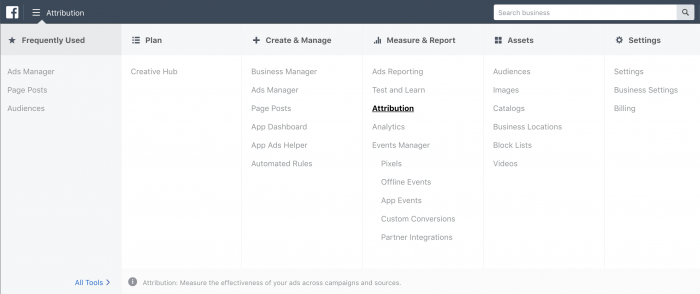
To set up the Facebook Attribution Tool, go here. You should also see it within your Business Manager’s top menu.
If you aren’t connected to Business Manager, it’s possible that you won’t get access to this tool. Based on my testing, there is a separate Attribution for each Business Manager. But I tried to access it with my personal account and could not.
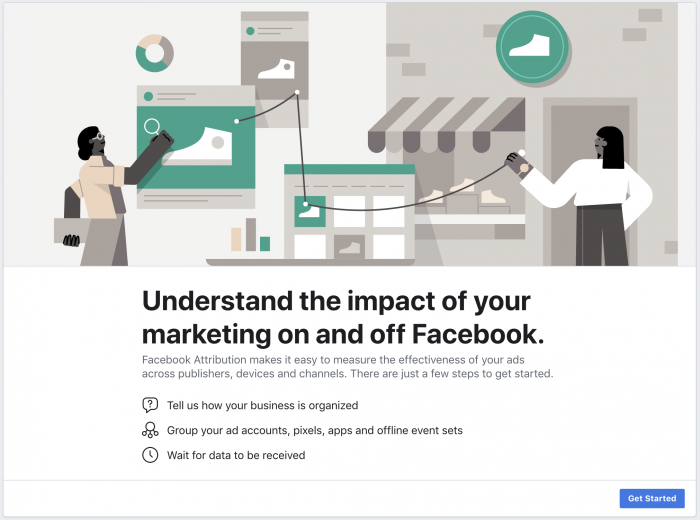
The first time you access this tool, you’ll see this…
Click “Get Started.”
Set It Up: Lines of Business
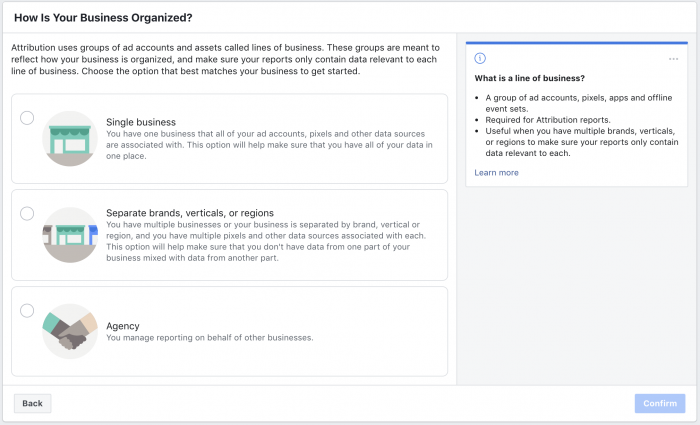
Facebook will first ask you how your business is organized (single business; multiple brands, verticals, or regions; or agency).
Essentially, do you manage ads for multiple businesses as an agency within the same Business Manager? Are you a single business? Or do you have more than one business that you own or oversee within this Business Manager?
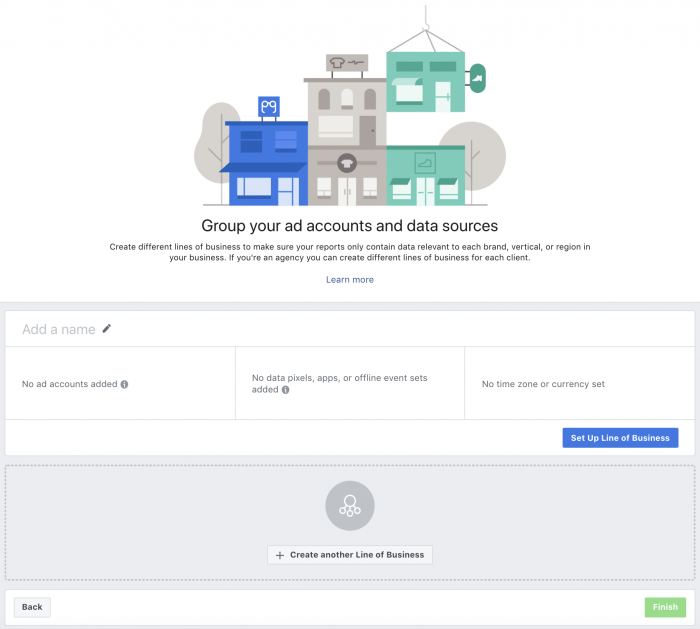
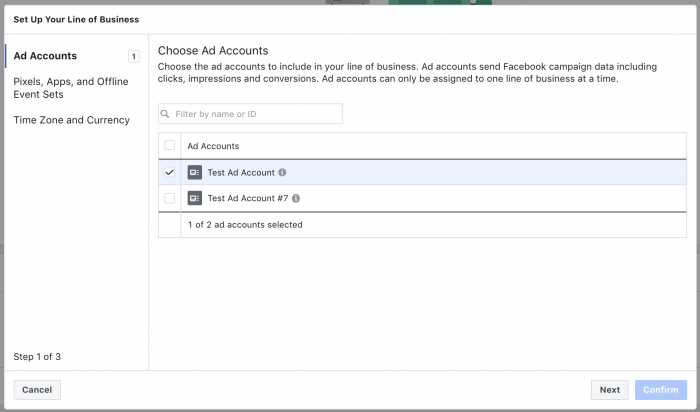
Next, you’ll need to set up your line(s) of business by grouping your ad accounts and data sources.
When you click “Set Up Line of Business,” the first thing you’ll be asked to do is choose ad accounts related to that business.
If you use more than one ad account to manage a particular business, make sure to select them. If an account isn’t listed, you’ll need to add it to your Business Manager.
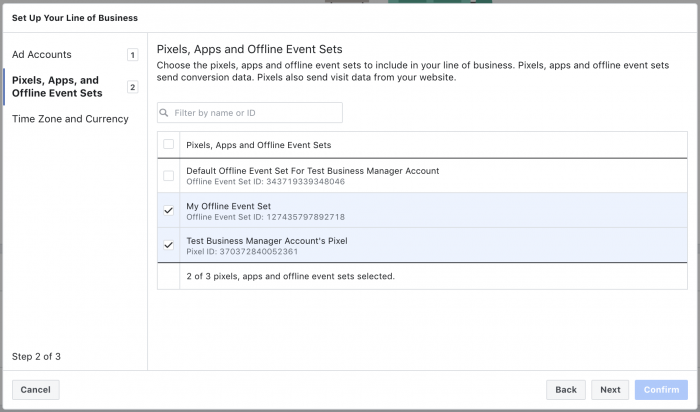
After selecting the ad account(s), click “Pixels, Apps, and Offline Event Sets” on the left.
Logically, you’ll want to select all of the pixels, apps, and offline event sets related to this particular business.
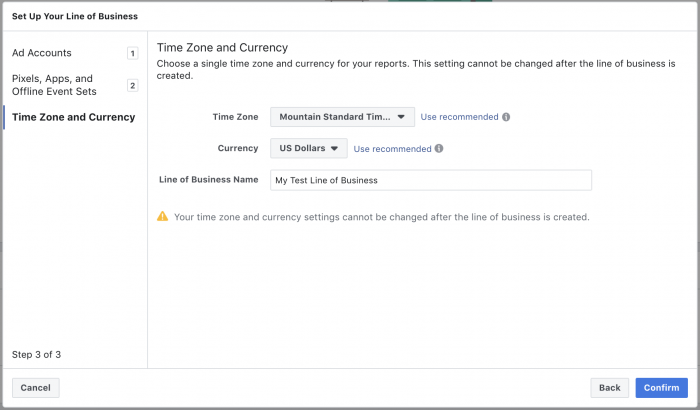
Then click “Time Zone and Currency” on the left and adjust the settings according to your local time zone and currency.
Note the message that you won’t be able to change the time zone or currency after setting this up.
When you’re done, click “Confirm” at the bottom right.
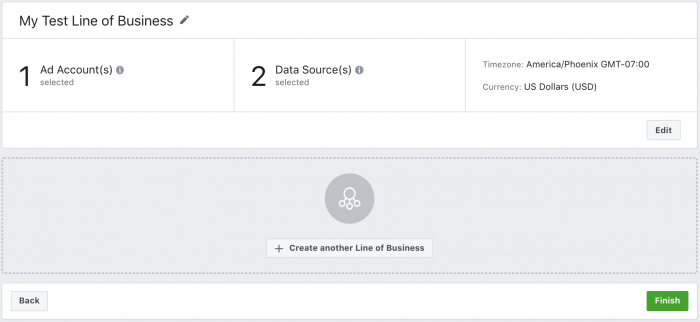
Now, you’ll see a brief summary of your line of business on the main Facebook Attribution set-up page.
If you need to add another line of business, do so now. If you’re done, click “Finish” at the bottom right.
Now, you’ll see this rather pointless alert, and you’ll — of course — want to “Continue to Attribution.”
Set It Up: Ad Platforms
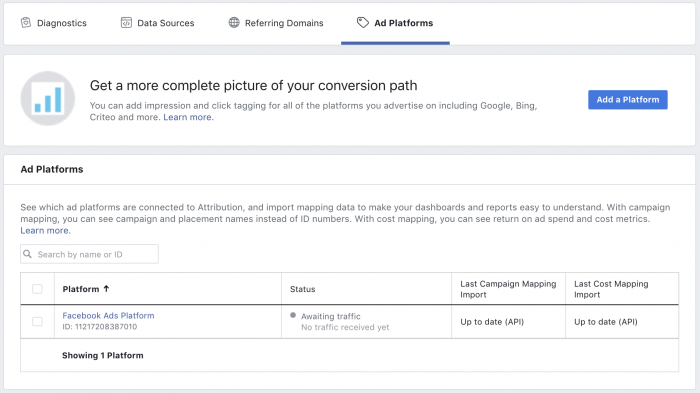
To complete the set-up, you’ll need to add any non-Facebook ad platforms that contribute to your traffic and sales. “Ad Platforms” is the final tab within the “Settings” view and will provide a list of all ad accounts that feed into this line of business. You should see the Facebook ad account(s) that you added earlier.
But note that you can also add another platform. It doesn’t have to be Facebook only.
Why would you do this? Facebook will already know if traffic comes from a particular domain (like Bing, Pinterest, LinkedIn, or Google). However, by connecting your other ad platforms, the Facebook Attribution Tool can then differentiate from organic vs. paid traffic.
Click that button to “Add a Platform”…
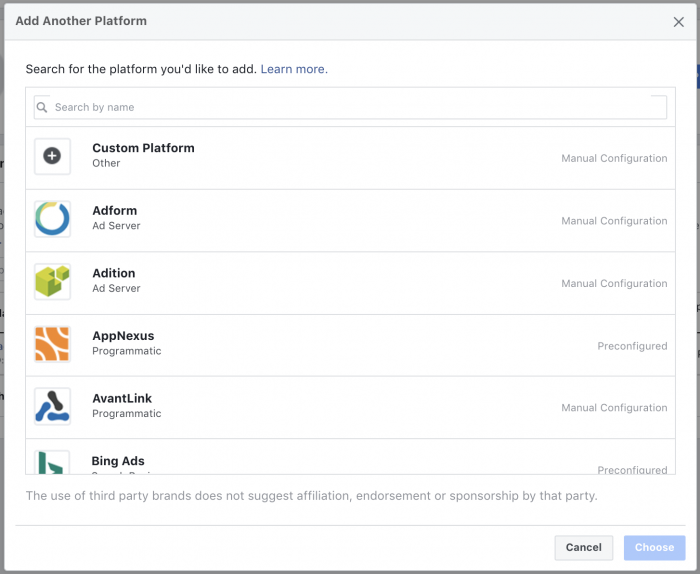
As I type this, there are 37 options, including Bing Ads, Google Ads, LinkedIn, OutBrain, Pinterest, SnapChat, and Twitter. (NOTE: Some are showing as “unsupported by the publisher,” but you can send a message to request support.)
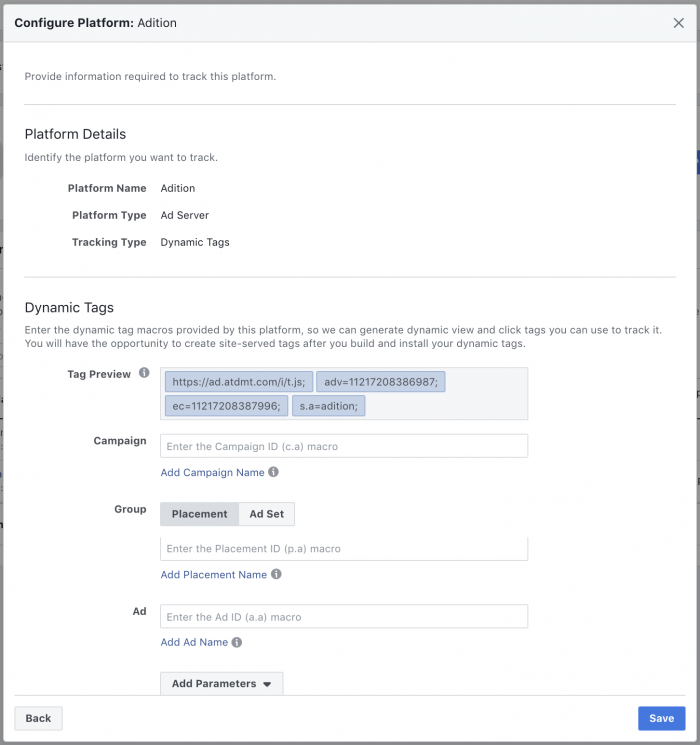
Manual configuration is required for some of the platforms. For example, adding tags for Adition…
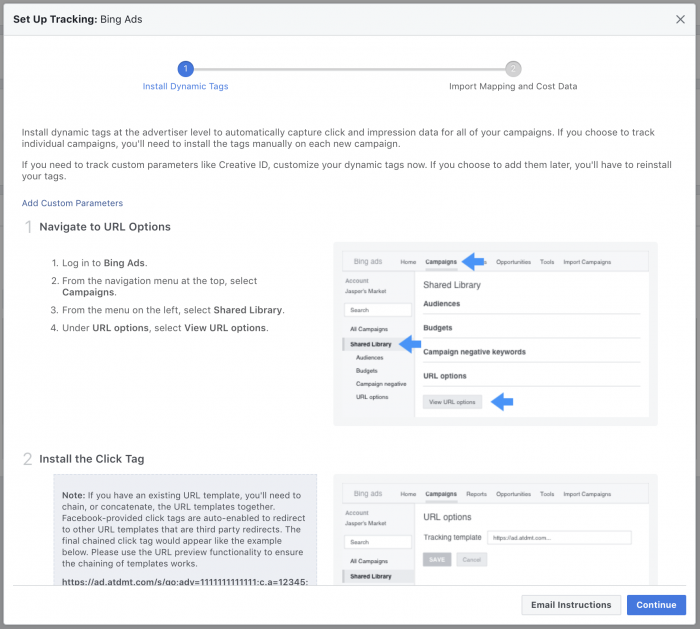
While others, like Bing Ads, are preconfigured…
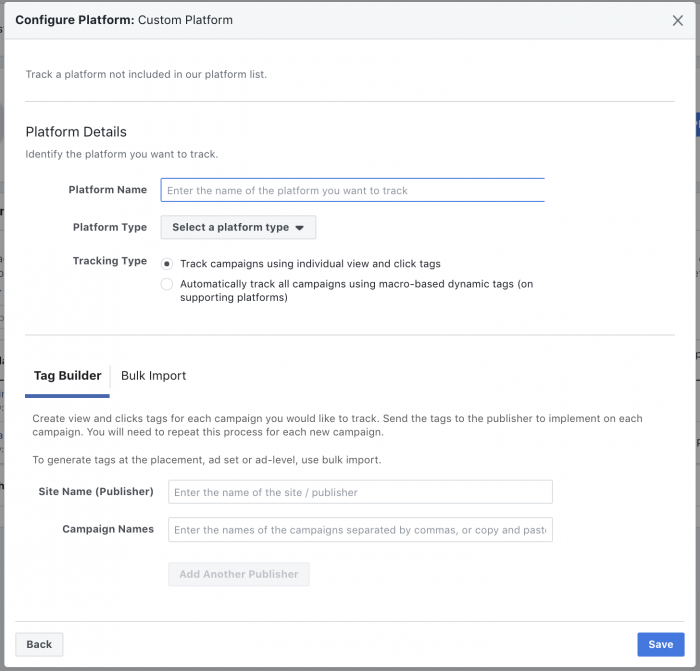
And if an ad platform that you use isn’t on the list, you can choose to add a “custom” platform.
You likely have questions about this process, and we’ll undoubtedly need to discuss it more later. In the meantime, this tutorial may help.
Facebook Attribution Overview: Quick Tour
Okay, so now we’re all set up. So we should see lots of valuable stuff right away, huh? Well, not so fast.
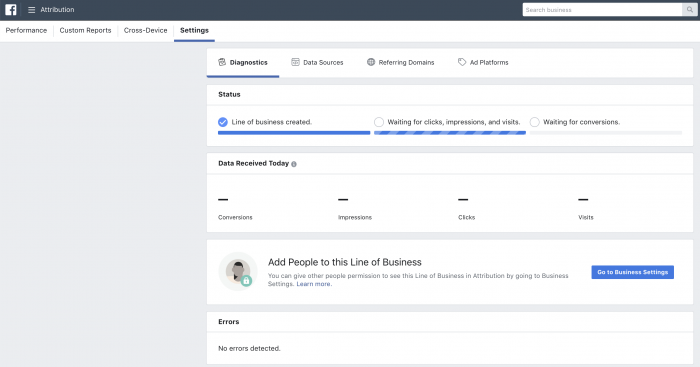
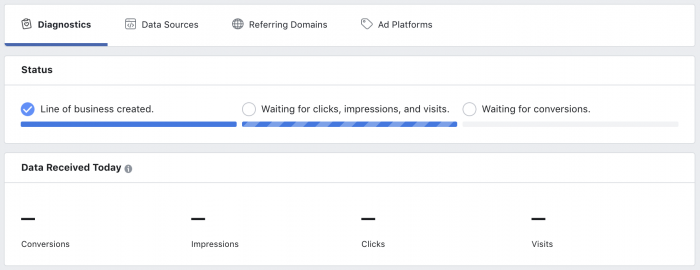
This is what you’ll see after first getting set up…
As mentioned earlier, this is the equivalent of creating and adding a new pixel to your website. The data that Facebook can collect and then report to you starts at that point. You will not get info for activity that occurs prior to configuring Facebook Attribution.
As a result, it may take a day. It may take several days or even weeks to get meaningful data. It just depends upon the amount of activity on your properties.
The Facebook Attribution Tool is broken up into the following sections:
- Performance
- Custom Reports
- Cross-Device
- Settings
Facebook Attribution Settings: Quick Tour
After the initial set-up, you’ll default to “Settings,” which is also broken into four sections:
- Diagnostics
- Data Sources
- Referring Domains
- Ad Platforms
Diagnostics won’t show you much of anything at first while the tool is building data from your data sources. It needs traffic and conversions.
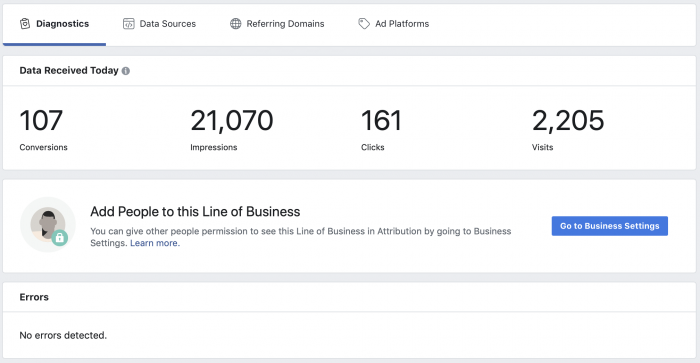
Eventually, though, it will look something like this…
You’ll see a reporting of conversions, impressions, clicks, visits, and errors (if there are any).
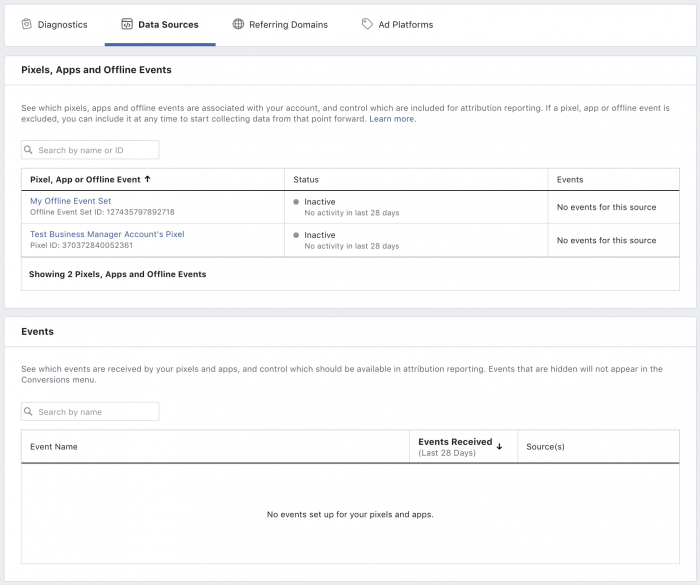
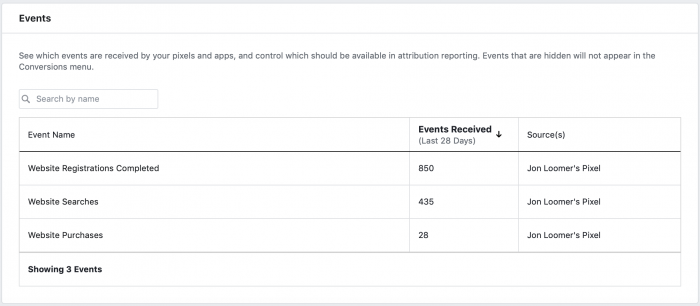
Data Sources will show the pixels, apps, and offline events that you added earlier. It will also list the recent events that have occurred on your pixel since adding it to the tool.
Depending on the events you track with the pixel, you may see something like this…
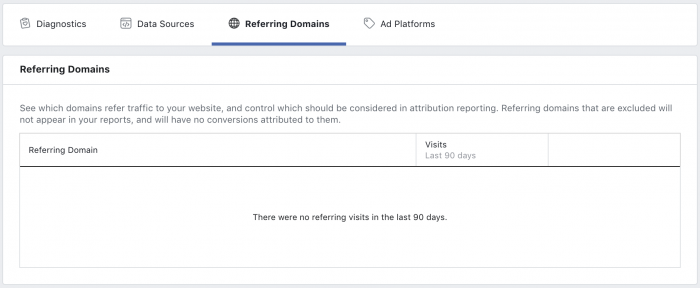
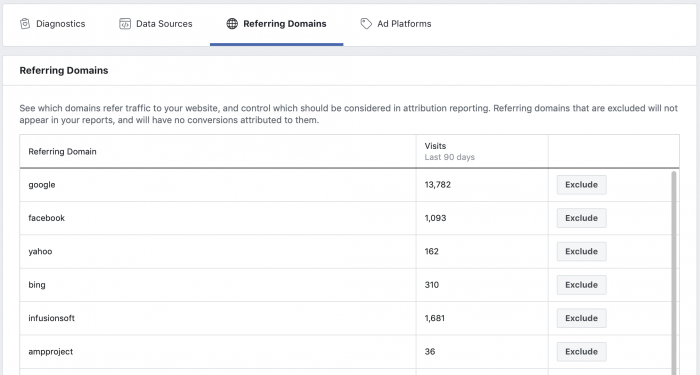
Referring Domains will list out all of the domains that have referred traffic to your website or app.
Once you have data, it may look like this…
We already discussed the Ad Platforms tab earlier.
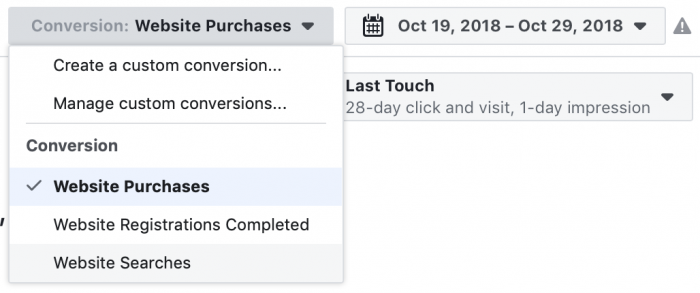
Drop-down Controls: Conversion
At the top right you’ll notice three drop-downs that will allow you to filter and alter data.
First, you can choose the type of conversion or event that will receive focus in the data on that page.
What appears here will depend upon what events you use with your pixel.
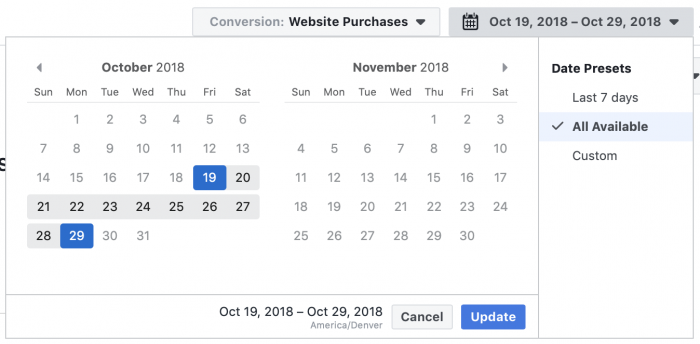
Drop-down Controls: Time Window
You can also change the time period, as you would for your Ads Manager.
Select specific days or go with “Last 7 Days” or “All Available.”
Drop-down Controls: Attribution Model/Window
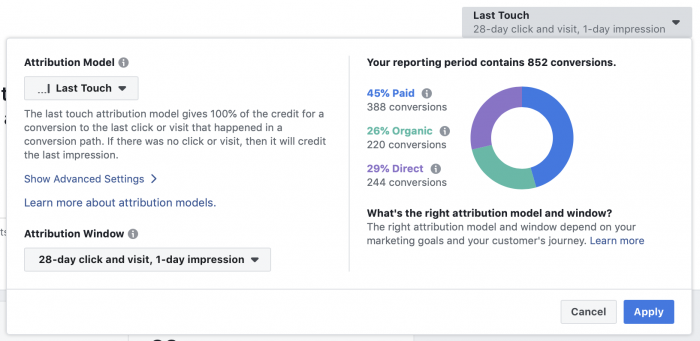
And finally, you can change the attribution model or window.
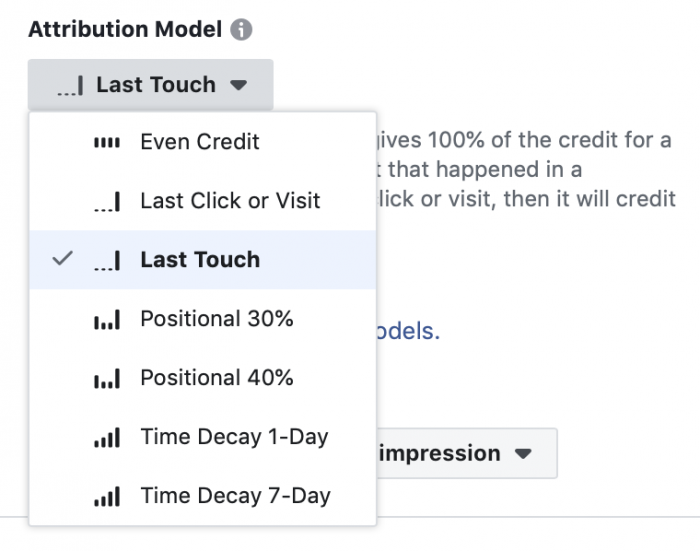
The default attribution model is “Last Touch,” which gives 100% of the credit for a conversion to the last click or visit (if no click or visit, then an impression) that happened in a conversion path. But, you can also select from several other options…
Here are your options and how they’re defined…
- Even Credit: gives an equal percentage of the credit for a conversion to each touchpoint on a conversion path.
- Last Click or Visit: gives 100% credit to the last click or visit that happened in a conversion path.
- Last Touch: gives 100% of the credit for a conversion to the last click or visit that happened in a conversion path. If there was no click or visit, then it will credit the last impression.
- Positional 30%: gives a specific percentage of the credit for a conversion to the first and last touchpoints in a conversion path, with the remaining credit distributed evenly across all other touchpoints.
- Positional 40%: gives a specific percentage of the credit for a conversion to the first and last touchpoints in a conversion path, with the remaining credit distributed evenly across all other touchpoints.
- Time Decay 1-Day: gives an increasing percentage of the credit for a conversion to touchpoints as they get closer in time to the conversion.
- Time Decay 7-Day: gives an increasing percentage of the credit for a conversion to touchpoints as they get closer in time to the conversion.
We can’t go much deeper on this topic here, but feel free to check out this tutorial on attribution models.
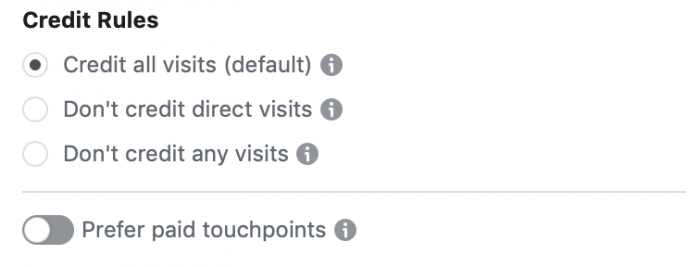
There are also some advanced settings…
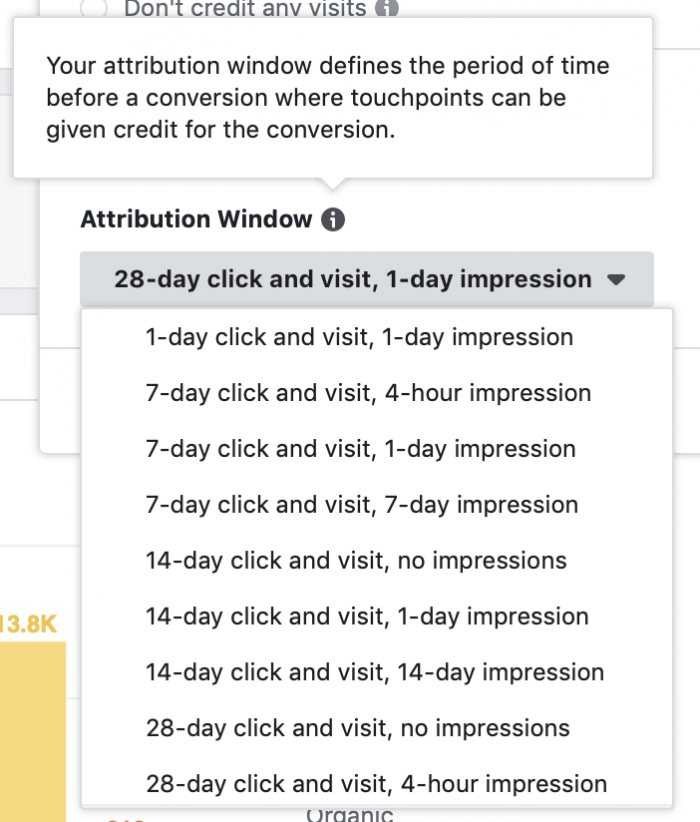
And you can alter how Facebook defines a conversion based on the attribution window (default being within 28 days of a click or 1 day of a view).
Attribution windows tend to be an eye-opener for new advertisers. You may assume that Facebook counts conversions based on someone clicking an ad and immediately converting on your website. But the reality is that Facebook measures people who click ads and come back on another day — or don’t click, but view, and convert later that day.
Facebook Attribution Performance: Quick Tour
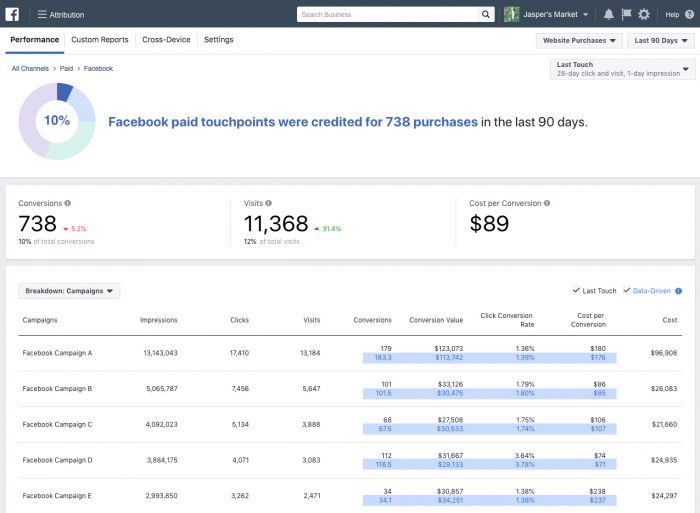
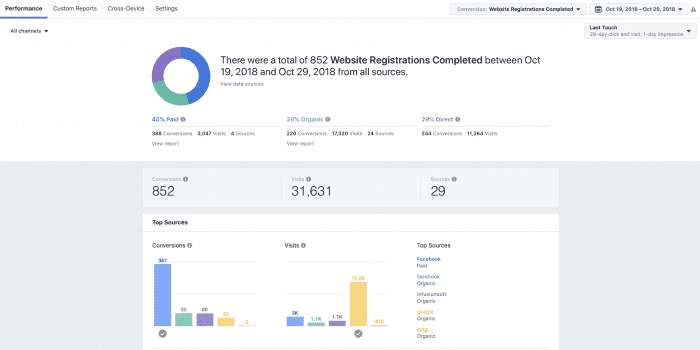
The first tab at the top left is for Performance. Once again, you won’t see anything there right away, and it may take some time to get much of value there. But eventually, you’ll see data splitting out the source of your conversions (paid, organic, domain, ad platform, etc.).
Here’s an example provided by Facebook:
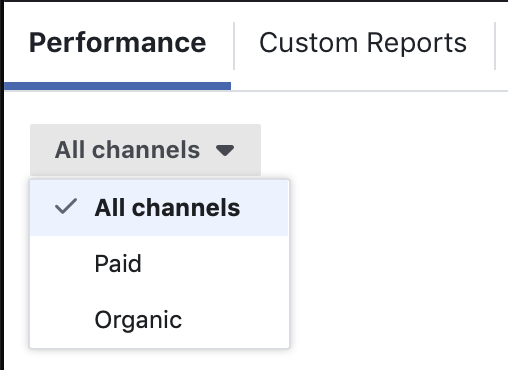
By default, you will be viewing all channels (organic and paid). But you can choose to focus on one or the other by clicking the Channels drop-down at the top left.
Facebook Attribution Custom Reports: Quick Tour
The next menu item is for Custom Reports.
The default view is for the sources of your conversions. One of the cool things about this info is that you can customize the type of report you create (hence, the “Custom Reports” title, I guess).
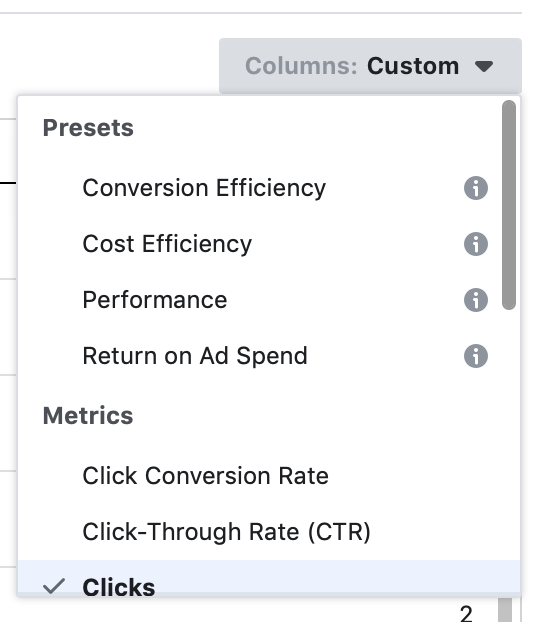
First, a few presets, including Return On Ad Spend…
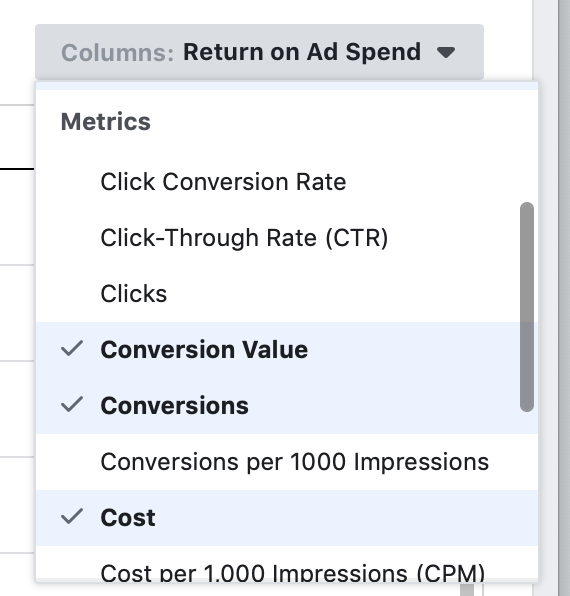
And from there, you can add or remove columns of data as you please…
Some helpful metrics here include Return On Ad Spend and Visit Conversion Rate.
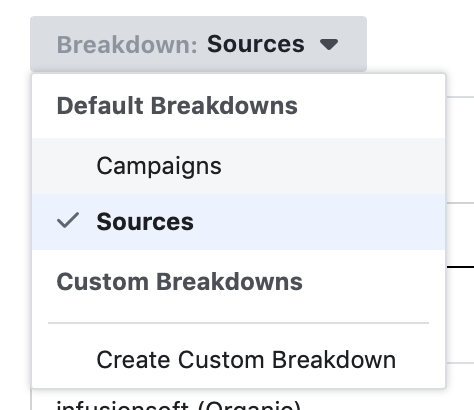
Instead of sources, your custom reports can also be broken down by campaign (controlled at the top right).
This report pulls out specific ad campaigns you’re running (across platforms) while also including rows for organic.
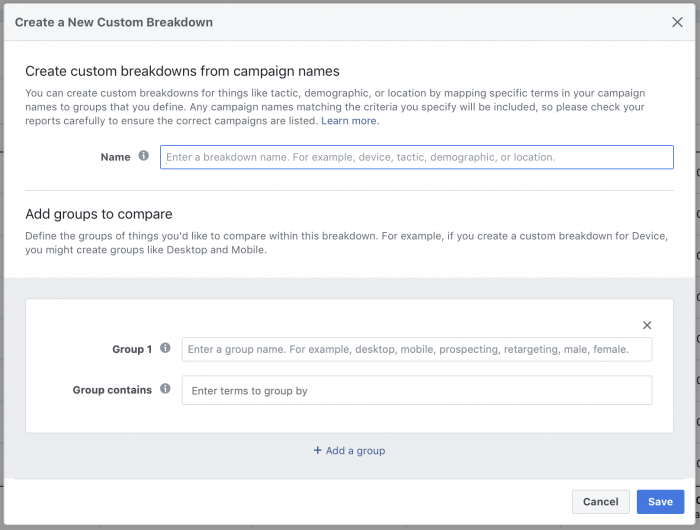
Within that last drop-down was the ability to create a custom breakdown.
This topic may require a separate blog post, but read more here for now.
Finally, the custom reports are displayed in columns by default, but you can also choose to view them as a graph instead (toggle at the top right).
Here’s an example of what a graph looks like in these reports…
Facebook Attribution Cross-Device: Quick Tour
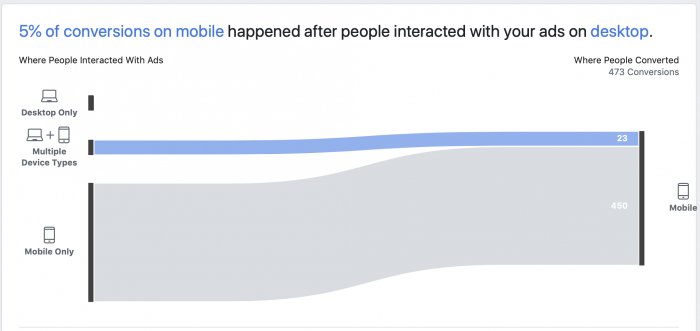
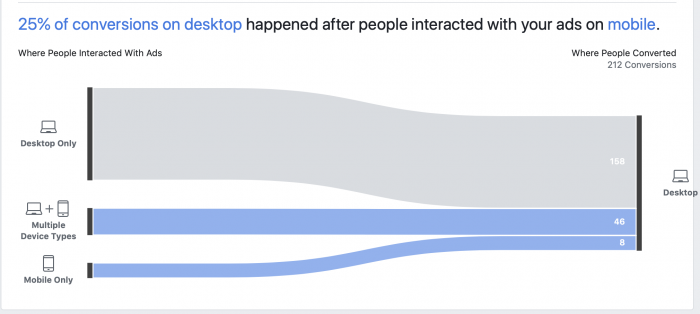
Finally, Cross-Device provides some top-level information regarding how interaction via multiple devices related to conversions. Here are examples…
How many conversion paths included both desktop and mobile?
How many conversions on mobile resulted after users interacted with your ads on desktop?
And what percentage of your conversions on desktop happened after users interacted with your ads on mobile?
That’s it. It’s interesting information, no doubt. But there’s no slicing and dicing of data the way there is in the other sections. At least, for now.
How Will You Use the Facebook Attribution Tool?
What’s your customer journey? How much value do your Google ads have versus Facebook ads in terms of leading to sales? What’s the mix of device types for a customer most likely to convert?
We’ll need to discuss in more detail — in another post — some specific use cases for the Facebook Attribution Tool, but these questions provide a start.
Your Turn
We’re just getting started here, my friend. As long as this post is, I fully realize it simply leads to more questions. And as someone who is just diving in myself, I don’t have all of those answers.
But there’s more to come. We’ll figure it out together. And it will be glorious.
Have you set up the Facebook Attribution Tool yet? What types of information are you finding?
Let me know in the comments below!
The post Facebook Attribution Tool: The Ultimate Introduction appeared first on Jon Loomer Digital.
