Google Shopping is an incredibly important tool in any ecommerce retailer’s arsenal. But, if you’re reading this article, you probably already know that.
You probably also know that Google Shopping ads produce over 85% of retail paid search clicks and that they routinely produce a 400-1,000% (or higher) return on ad spend (ROAS).
But none of those statistics matter if you don’t know how to set up and run a profitable Google Shopping campaign.
The good news is, you’ve come to the right place. At Disruptive Advertising, we’ve helped countless ecommerce businesses—from startups to enterprise companies–succeed with Google Shopping.
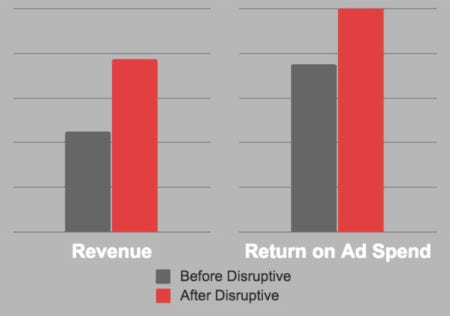
For example, we recently helped an ecommerce retailer increase their ROAS by 225% and total revenue by almost a million dollars…and we did it in a matter of months.
If you want results like this for your own business, this article is for you.
Here, we’ll go over everything you need to succeed at Google Shopping (including all the things Google doesn’t tell you). It’ll take some work, but if you follow the recommendations in this article, you should be well on your way to putting the power of Google Shopping to work for you.
Sound like a plan? Let’s get started!
What is Google Shopping?
Just in case you’re not familiar with Google Shopping ads already, let’s take a moment to talk about what Google Shopping is. To put it simply, Google Shopping is how you get your products featured in those nifty Product Ads on Google’s search results page.
For example, here’s what shows up if you search for “trench coat” on Google:

As you can see above, Google displays 3 different types of results for product-related searches: Google Shopping ads, paid search text ads and organic search results.
When you look at these search results, what is the first thing that you notice? The Lululemon ad or the Nordstrom link? Probably not.
If you’re like most people, the pictures are what you notice first. Before you even realize that Lululemon text ad or Nordstrom’s organic search result are there, you’re already scanning through purchasing options.
And that’s the power of Google Shopping.
Of course, if you scroll through the 30 products on the search engine results page and can’t find what you’re looking for, you can always click “Shop for trench coats on Google” and filter through all of the options available on Google Shopping:

What makes Google Shopping truly powerful, however, is the fact that virtually none of the products or companies that show up in these ads can be found on the first page of organic search results. Without Google Shopping, these products would never be seen by potential customers.
Best of all, Google Shopping puts your products in front of high-intent, low-funnel search traffic that wants to buy what you’re selling.
Unlike most forms of advertising—like display advertising or social media marketing—people who see your ads on Google are looking for what you have to sell. When someone searches for “trench coat” on Google, you don’t have to convince them that winter is coming and they should buy a stylish coat—you just have to convince them that your trench coat is the coat they should buy.
How Google Shopping Works
Ideally, your product(s) would rank well organically for every relevant Google search, but let’s be honest, if you’re not a big company, the SEO odds are not in your favor.
But…with Google Shopping, you don’t have to rank well organically to show up for relevant searches. Google lets you pay to play.
To have your products featured on Google Shopping, you need to work with two platforms: Google AdWords and Google Merchant Center. Google Merchant Center is how you tell Google about your products. Google AdWords is how you tell Google how you want to market your products.
The AdWords Auction Process
Google AdWords is a pay-per-click (PPC) advertising platform, which means you pay to drive traffic to your website and/or landing pages. That being said, advertising on Google isn’t as simple as saying, “I want to pay X for every click.”
Unfortunately, you’re not the only business out there who wants clicks from Google users. To make sure that your ads are seen, you have to outbid the competition.
The good news is, advertising on Google doesn’t mean you’ll spend the rest of your career sitting in an auction house listening to John Giannandrea (Google’s head of search) rattle off product search terms at high speed.
As fun as that is to imagine, the Google auction process is a much more efficient process than that.
The information you upload to the Google Merchant Center tells Google which types of searches your products should show up for. In Google AdWords, you enter the maximum amount you are willing to pay for a click from one of those searches.
That maximum amount is your “bid” for that keyword.
When someone does a search that your product is eligible for, Google compares all of the eligible bids and chooses who ranks where. Since this whole process is an auction, all you have to do is outbid the next lowest advertiser—you don’t actually have to pay your maximum bid every time someone clicks on your ad!
Using Google Merchant Center
Unfortunately, as good as Google’s algorithms are, Google still can’t read minds. Google AdWords doesn’t know what you want to sell (product name, SKU, size, color, description, etc), if it’s in stock or how much you’re charging for a particular item. You have to “feed” that information to them.
To give Google all of this information, you need a Google Merchant Center account (you can sign up for an account here).
Using your Merchant Center account, you can upload a shopping feed with information (availability, price, color, etc) about all the products you want to sell. This tells Google what’s in your product catalog and what information should be in your ads.
If anything changes (you run out of trench coats, for example), all you have to do is update your product feed and reupload it to your Google Merchant Center account.
Easy enough, right?
Setting up your Merchant Center account is fairly easy (see the video above for a straightforward walkthrough), but once you have your Merchant Center set up and your shopping feed uploaded, you’ll need to connect your Google Merchant Center to your AdWords account (click here to sign up for an AdWords account) .
Here’s how:
- Log into your AdWords account and look at the top right-hand corner to find your 10-digit AdWords customer ID.
- Log into your Google Merchant Center account, click the 3-dot dropdown in the top right-hand corner and click “Account linking.” Click “Link Account.”
- Enter your AdWords customer ID and click “Link.”
When the Status changes to “Linked”, you’re ready to go! Either click “Create Shopping Campaign” or go back to your AdWords tabs to start building your campaigns.
Putting Your Shopping Feed Together
As you can probably imagine, a good shopping feed is the key to any successful Google Shopping campaign. Your shopping feed tells Google what your products are, how much they cost, what images and ad copy to use in your Product Listing Ads, what searches your ads should show up for and much, much more.
Not surprisingly, it pays to get your shopping feed set up right.
Since the success or failure of your Google Shopping campaigns depends on how well your shopping feed communicates with Google, Google has quite a few fields you can use (or are required to use) in your feed.
There are a variety of shopping feed management platforms out there (or you can even manually create and manage your shopping feed) that can handle the technical management of your feed, so in this article, we’re going to focus on how to get the most out of your shopping feed.
We won’t go over every single field you have available, but let’s take a look at the most important fields in your feed:
Google Product Category
As we mentioned earlier, Google Shopping campaigns don’t use keywords to target your ads. They use product categories. So, as you might imagine, entering the right category in the “google_product_category” is pretty important.
You pick your product category from the Google Product Taxonomy list.

The broader your category, the more potential searches your product could be eligible for, so you might wonder about picking a very broad category for your product to maximize your impressions—but don’t do it! The broader your category, the more irrelevant clicks and impressions you’ll get.
Irrelevant clicks don’t turn into sales, so picking a broad category usually means you’ll end up wasting a lot of money.
On the other hand, the more specific your category is, the more relevant your traffic will be. After all, if you’re selling cycling jerseys, will the “Activewear” or “Bicycle Jerseys” category be more likely to drive relevant clicks?
“Bicycle Jerseys” is a subcategory of “Activewear”, so picking the “Bicycle Jerseys” category might result in fewer impressions and clicks, but those clicks will be a lot more likely to turn into purchases.
Title
Your title is the first thing people will see when they perform a relevant search on Google:

As you might imagine, your title has a big effect on the clickthrough rate of your ads, so it’s important to spend some time crafting a good title strategy for your feed.
Keep in mind that while Google allows up to 150 characters in your title, Google will only display about 70 characters, so be sure to put your most important keywords at the beginning!
In addition, Google frowns on putting overtly promotion text (“Limited Offer”, “Free Shipping”, etc) in your title, so focus your title content on products specifics like material, color or size.
Description
The description field contains the text your potential customers can read to get a better feel for exactly what your product is and does:

In the description field, you can enter up to 5,000 characters, but Google will only show a sentence or two. So, again, it’s important to make sure that you list the most important information first.
Here again, promotional content is a no-no, so keep it focused on the features and benefits of the product—not the benefits of buying from you.
Link
Guess what? If you’re going to run ads on Google, you need to have somewhere to point your clicks!
However, you can’t just point those clicks anywhere. Your link needs to point to your product page, not your homepage. Your link also has to have the “http://” part of your URL.
If you have a different product page for mobile users, put that link in the “mobile_link” field.
Image Link
You’ll also need to include a link to an image of your product in the “image_link” field. This link should point to a high quality, 800 x 800 px (or bigger) picture that is free of logos and extra text:

If you really want your images to succeed, though, your images need to be eye-catching. It’s not enough just to have a nice picture, you want it to draw the attention of your potential customers.
Condition
The condition field only has 3 options (new, used and refurbished), but it’s required, so make sure you complete it.
Availability
The availability field is also required and easy to complete. You can pick from in stock, out of stock and preorder. However, this field is particularly important to keep regularly updated. Otherwise, you could end up with a lot of disappointed customers!
Price
Ah, price. This is the field you really care about. All you have to do here is give your selling price and currency (for example, 547.43 USD). Just make sure that your currency matches the country you are advertising in.

One thing to keep in mind with your price (as well as condition and availability) is that the information in your shopping feed needs to match the information on your product page. Google will penalize your ads or even prevent them from showing if you don’t.
So, if your price changes on your page, make sure you’ve updated your shopping feed!
Global Trade Item Numbers (GTINs)
Google uses global trade item numbers (GTINs) to group identical products in on the shopping results page.
GTINs are manufacturer issued. Here are the GTINs you’re most likely to see:
- UPC—this is the primary GTIN in North America
- EAN/UCC—the major GTIN used outside of North America
- JAN—the Japanese GTIN
- ISBN—a GTIN for books
Some products will have more than one GTIN (eg, both a UPC and an EAN). In this situation, just pick one GTIN to use in this field.
If your product doesn’t have a GTIN, you’ll need to use your manufacturer part number (MPN).
Manufacturer Part Number (MPN)
MPNs are created by the manufacturer of a part. They tend to be very specific to a particular part, but they serve the same basic purpose as a GTIN.
If you’re not sure what your GTIN or MPN is, try checking with your suppliers. If that fails you, you can try upcitemdb or barcodelookup.
Identifier Exists
Of course, if you’re selling custom or antique goods, you may not have either an MPN or a GTIN. In this case, set “identifier_exists” to “false”. That way, Google won’t look for a GTIN or MPN in your feed.
Brand
The brand field lets Google know who made the product. In general, this should not be your company name (unless you happen to be the manufacturer of your own product).
For example, if Amazon decided to run shopping ads on Google again, Amazon might list Scholastic Corporation as the brand for the latest Harry Potter novel, but its own business name (Amazon) as the brand for the Kindle Fire.
Color, Gender, Age Group, Size
If you are selling shoes or clothing, the color, gender, age group and size fields are all required. Of course, since most customers who are in the market to buy clothes or shoes want this information, these fields would be a good idea to complete if they weren’t required fields.
ID
The ID field is really mostly for your own reference. It’s a unique number you create that allows you to connect your Google data to your store data, so use whatever sort of system (SKU, internal reference number, etc) makes sense for your business.
Creating Google Shopping Campaigns
Now, if you’ve ever played around with Google AdWords, you’re probably familiar with paid search text ads. Google Shopping ads (aka, “Product Listing Ads”) are a bit different.
Unlike text ads, you can’t tell Google, “I want my ads to show up when someone uses this specific keyword.” Instead, Google decides when your Product Listing Ads (PLAs) are eligible for display.
Putting together Google Shopping Campaigns and Product Listing Ads (PLAs) is pretty straightforward. If you already have an active AdWords account and you want to create a new campaign, check out the video below:
Here’s what you’ll need to do to create a basic shopping campaign (for more details, click here):
- Open your AdWords account.
- Click the “Campaigns” tab, then hit “+ Campaign” and choose the “Shopping” option.
- Name your campaign.
- Pick the “Merchant identifier” associated with your Google Merchant Center account.
- Click the drop-down menu next to “Country of Sale” and pick the country where you want to advertise your products. If you would like to get more specific with your location or other settings, you can adjust that in the settings section (more on that in a second).
- Enter the maximum amount you are willing to pay for a click next to “Default bid” (don’t worry, you’ll be able to adjust this later).
- Enter the total amount you want to spend next to “Budget”.
- Hit “Save and continue”.
If you’ve never created an AdWords campaign before, click on “Campaigns” in the left-hand bar, then click on the blue “+”. At this point, you’ll have a variety of campaign types to choose from:

<img class=”alignnone size-full” src=”https://neilpatel-qvjnwj7eutn3.netdna-ssl.com/wp-content/uploads/2015/10/confused.png” width=”975″ height=”738″ />
In this article, we’re going to stick with Google Shopping Ads, but if you’re interested in running some of these other types of campaigns, check out the links below:
To get started creating your first text ad campaign, click on the “Shopping” option and let’s get started!
Step 1: Choose a Goal
Every good online marketing plan starts with a goal (or two, or three…). Knowing what you want to get out of your campaigns will guide every Google Shopping decision you make, which is why the first thing Google AdWords asks you to do after you’ve picked a campaign type is to pick a goal.

Since you’re creating a Google Shopping campaign, your goal is probably to sell stuff, so click “Sales” and move on.
Step 2. Pick Your Target Location
Once you’ve decided what your advertising goal is, it’s time set up your campaign.

Pick a name and language for your campaign and then select where in the world you want your ads to be displayed. If your target audience really is everyone in the US/Canada or the whole world—which it often is for ecommerce businesses–leave this alone.
Otherwise, I recommend using the “Enter a location to target or exclude” search bar:

Here, AdWords gives you the ability to target or exclude certain locations, so if we wanted to target all of Florida except for Sarasota, that’s an option.
This is important, because lot of companies target everyone in a state, region or country without realizing that they don’t actually want to pay for clicks in that area. For example, if you’re trying to sell fur keychains, you might not want to run ads in San Francisco where fur sales are illegal.
Yes, you might get clicks, but those clicks aren’t likely to turn into sales. So, while being smart about your location settings may not be particularly exciting, it’s well worth your time.
Step 3. Decide on Your Budget
Often, marketers and business owners pick their Google Shopping budget on a whim or based on what they feel like they can afford at the time. This is a real shame because careless budgeting often leads to ineffective campaigns…or a lot of wasted ad spend.
To avoid both of these problems, make sure you take the time to run the numbers and come up with a budget that allows you to maximize clicks without eating too far into your profit margin.
Once you’ve figured out a budget that makes sense for this campaign, divide it by 30 and enter the result as the average you want to spend each day in the “Budget” section. In a given month, AdWords won’t spend more than 30 times more than your daily average, but it might spend more or less in a specific day.

If you want Google AdWords to spend your budget as quickly as possible (you’re advertising morning coffee, for example), click “Delivery method” and switch to “Accelerated”. Otherwise, it’s time to select your bidding strategy!
Step 4. Select a Bidding Strategy
Setting Your Bids
Bid management is actually a fairly complex process. But, for your first campaign, let’s stick with the basics.
When determining how much you should bid, you’ll want to consider:
- The average CPC of your product(s). Different products will cost more than others due to volume and competition levels.
- Your budget. If you have a smaller budget and want to make it go further, consider bidding on lower cost keywords or making smaller bids.
- Your anticipated ROAS. ROAS is one of the most important Google Shopping metrics, but it isn’t perfect. Obviously, your marketing spend can’t be greater than your profit margin, but if bidding more means you eat into your profit margins a bit and double your sales volume, you may want to opt for a lower ROAS.
Ultimately, the right bid will allow you to drive the maximum number of sales for the lowest cost-per-click. Finding that balance point can be tricky, but the results are worth it.
Step 5. Put Together Your PLAs
Unlike text ads, creating PLAs for Shopping Campaigns is easy. The shopping feed you uploaded to your Google Merchant Center account tells Google AdWords everything it needs to know to create your ad.
To set up your PLAs, all you have to do is:
- Click on your Shopping Campaign and click on the “Ad groups” tab.
- Click “+Ad group”.
- Name your ad group.
- Click “Save and continue”.
If you want to get into the more nitty-gritty of campaign structure, AdWords offers a ton of customization options you can use to separate products into different groups with different bids, but we’ll get into some of those tactics later on.
Step 6. Set Up Conversion Tracking
Now, at this point, you could technically launch your Shopping Campaign. There’s just one problem. If you turn your campaigns on now, you’ll have no idea what’s working and what isn’t in your campaigns.
Sure, Google will tell you how many clicks your ads are getting, but you won’t really know if those clicks are turning into profitable sales.
To get at that information, you need to set up conversion tracking.
Essentially, conversion tracking allows you to link your Google Shopping clicks to the actual sales they produce. That way, you can accurately measure and optimize your return-on-ad-spend.
Setting Up Conversion Tracking in AdWords
The good news is, it’s pretty easy to set up conversion tracking in Google AdWords.
To get started, click the wrench icon in the upper lefthand corner of your screen, then click on “Conversions” under the “Measurements” menu.

This will bring you to the “Conversion actions” page. Click the blue button to add a new conversion.
Next, you’ll have the option to choose between 4 different types of conversion action:

Since the goal of your Google Shopping campaign is to drive sales on your website, click “Website”.
This will bring up the following options:
![]()
In the screenshot above, I’ve created a conversion for people who buy a trench coat. Let’s take a closer look at some of these settings:
Value
You can have AdWords assign a specific dollar value to your conversions that you can track in the main AdWords interface, which is very handy for ecommerce businesses.
Unfortunately, while this works great if you only sell a handful of products, if you’re selling dozens-to-hundreds of products, you’re going to need to set up transaction-specific conversion tracking.
To do that, you’re going to need to tweak the conversion code Google AdWords generates for you and customize it to pull sales data directly from your ecommerce shopping platform.
Discussing how to set this up for each shopping platform is beyond the scope of this article, but we’ve already covered this elsewhere on our blog.
So, to learn more about how to implement transaction-specific conversion tracking for your Shopping Campaigns, just click on the name of your shopping platform below:
Even if you’re customizing your tracking code, Google will still ask for a default number to include here. If you’ve set your transaction-specific tracking up right, this number shouldn’t matter, so I generally recommend setting it equal to 1.
Count
Here, we have the option to count every conversion separately or only allow one conversion per click. If you choose to track every conversion, that means if someone makes two purchases, those purchases will be counted as separate conversions—even though they were both from the same person.
Hypothetically, tracking every conversion can result in a conversion rate of over 100%–especially if you have separate conversion actions set up for different products.
Most of the time, tracking conversions separately can muddy up a couple of reporting metrics, but it usually provides better data overall.
Conversion Window
“Conversion window” refers to the maximum length of time between a click and a conversion that you want Google AdWords to track.
Here, I’ve set this to 30 days, so if someone clicks on my ad and then comes back and converts 10 days later, it will show up as a conversion from that ad.
Since most ecommerce businesses have a relatively short purchasing cycle (people click your ads and either buy or don’t buy), many ecommerce businesses set this timeframe to a week or 30 days, but the “right” conversion window for you will be specific to your business.
View-Through Conversion Window
“View-through conversion window” is a kind of funny metric. Essentially, you use this setting to tell Google AdWords how to measure the impact of an ad when it isn’t clicked.
For example, if someone searches for “trench coat” and sees my ad—but doesn’t click on it—and later that day clicks on a link to my site on Pinterest and makes a purchase, that conversion would show up as a “view-through conversion” for the ad they saw.
Include in “Conversions”
This is just a checkbox that tells Google AdWords whether or not you want this action reported as a conversion in your reports.
Unless you have an action outside of product sales (like viewing the shopping cart page) that you want to be able to track using a custom report, but don’t want to show up in your regular reports, leave this box unchecked.
Attribution Model
Sometimes, the path to conversion isn’t as simple as “they see my ad, click and convert”. For businesses with a multi-step marketing funnel, this option is a good way to measure the contribution of different steps in their funnel.
Ecommerce usually has a straightforward marketing funnel, though, so it’s usually best to stick with “Last click”.
Using Your Snippet
Once you hit “Create and continue”, Google will generate a couple of code snippets for you to add to your website.
![]()
The first snippet is a “Global site tag” you will need to add to your entire website (lean on your developer for help with this if you don’t manage the backend of your site). You’ll only need to add this to your site once.
Essentially, the global site tag will “cookie” the browser of anyone who visits your site, tracking how they interact with your site and adding them to a list you can use for retargeting ads (we’ll get into that later).
The second snippet is specific to the conversion action you just created. Typically, ecommerce sites add this code to their “thank you” page or order confirmation page.
Alternatively, you can add this code to a button on your site by switching from “Page load” to “Click”. This is useful if you want to report a conversion when someone clicks on an important button (for example, the “Buy Now” button) on your site.
Unlike the global site tag, you’ll need to add a new “Event snippet” to any relevant pages or buttons every time you create a new conversion action.
By the way, if you happen to be using Google Analytics on your website (and you should be), you can use Google Tag Manager to integrate your Google AdWords data with your Google Analytics data. To learn how, check out this article.
And that’s it! Your first Google Shopping campaign is ready to go! Launch it and let’s talk about some ways to optimize your campaigns during the coming months.
Optimizing Your Google Shopping Campaigns
Now, if you’ve ever played around with Google AdWords, you’re probably familiar with paid search text ads. Google Shopping ads (aka, “Product Listing Ads”) are a bit different.
Unlike text ads, you can’t tell Google, “I want my ads to show up when someone uses this specific keyword.” Instead, Google decides when your Product Listing Ads (PLAs) are eligible for display.
So, instead of optimizing your keywords, you’ll need to focus on optimizing each of the following areas:
- Campaign settings. As you run your campaigns, you’ll gain new information that you can use to tweak your campaign settings, so it’s a good idea to update your settings every so often.
- Shopping feed. The shopping feed you upload into the Google Merchant Center is how you control which searches your products show up for, what your ads look like, where clicks are sent and what your ad copy will be.
- Bid strategy. When you can’t pick what keywords your ads are eligible for, using the right bid strategy is absolutely critical to maximizing the profitability of your campaigns.
- Campaign structure. Although the structure of your Google Shopping account might not seem important, how you structure your campaigns can have a huge impact on your ability to properly manage and optimize your ads.
- Remarketing campaigns. Unfortunately, even when people want to buy what you’re selling, they don’t always buy right away. A good remarketing campaign can keep you in front of your potential customers until they finally make a purchase.
This is where all that conversion tracking data you worked so hard to acquire comes into play. Using that information, you can quickly identify a variety of opportunities in your Shopping Campaigns and make the necessary tweaks to maximize your results.
Let’s take a look at how to optimize your Google Shopping campaigns in each of these areas.
Campaign Settings
Although it might feel like we just talked about how to pick your campaign settings, there are a few settings you can only truly optimize after you’ve run your campaigns for a bit.
If you’ve taken the time to set up conversion tracking, you can use that data to optimize your campaign settings and ensure that you are targeting the most relevant traffic with your ads.
Here are a few things to try:
Geo-Targeting
Let’s face it, certain products just perform better in certain areas. You don’t see a lot of kayaks for sale in Arizona, but in Florida they’re all the rage.
While some locations are an obvious “no” or “yes” for certain products, you can’t always predict how well a given product will perform in different locations.
Once you have some conversion data, however, you can figure out which locations are the most profitable by clicking on the “Reports” tab at the top of the AdWords interface, “+ Report” and then creating a new table report.
From there, you can view a variety of location-specific results by adding in different location-specific columns:

For example, here I’ve selected “Region” and “Conv. value/cost” to get a sense for this client’s ROAS in a variety of different areas.
Based on this report, it looks like this client gets about $13.00 for every $1.00 they spend on Google Shopping clicks from the Yukon Territory, so it would probably be a good idea to increase their efforts in this region.
As you can see on the right of the above screenshot, there are a lot of other location filters you can use to get a feel for where your PLAs are performing well or poorly.
You can also evaluate your performance in those locations using almost any metric you can think of, including impressions, click-through rate, revenue and everything in between.
Once you have this information, you can decide which locations you should be targeting with a given campaign and adjust your location settings accordingly.
Alternatively, by setting up different campaigns for different product categories that sell better in different locations, you can use this approach to ensure that you making the most of your ad spend for each category. It will take some time and effort to get this working properly, but this can be a great way to eliminate wasted ad spend.
Ad Scheduling
Similarly, not all products sell equally well at all times of day, days of the week or seasons.
If you look back up at the Reporting Tool screenshot above, you can see that you also have a variety of time filters you can use to determine the ideal times to run your ads.
Or, if you find it hard to interpret this data in spreadsheet format, you can always switch to a bar chart:

Here, you can clearly see that this client’s cost-per-conversion is much higher in the afternoon and evening than in the morning. They get most of their conversions around 10:00 am, so it may be a good idea to add a bid modifier for the morning hours or even turn off their ads after about 4:00 pm.
Negative Keywords
Although you can’t use keywords to tell Google what searches you want to target, if a particular search isn’t relevant to your product, you can tell Google not to target that search.
In addition to adding negative keywords at the campaign level, you can also add them to ad groups.
So, if you have an Adult Shoes campaign with Men’s Shoes and Women’s Shoes ad group, you could add [children] and [kids] as negative keywords in your Adult Shoes campaign and add [mens] and [male] as negative keywords in your Women’s Shoes ad group.
Now, these sorts of negative keywords are fairly obvious, but you can’t always predict what sorts of search terms will trigger your ads or how profitable those search terms will be.
The good news is, to identify search terms that aren’t delivering good results in your campaigns, all you have to click on your Keywords tab, click “Search Terms” and add a filter for “Conversions < 1”:

This report will show you all of the search terms that your ad showed up for that didn’t produce any conversions. If you look at a broad time window like 2-3 months and see search terms that are eating a lot of ad spend on this list, you’ve probably just found some good negative keywords to add.
Shopping Feed
Your shopping feed is what Google uses to create your PLAs, so you need to make sure your shopping feed is as optimized as possible.
There are a lot of tweaks you can make to your feed, but for this article, we’re going to focus on the key shopping elements that dictate the content of your ads: your titles and your images.
Titles
Your titles are how you market your products to a potential buyer, so it should come as no surprise that optimizing your titles can increase clicks by up to 9.6x.
In general, PLA titles work best when they include keywords like material, color, brand or size. Since they can’t see the product in person, most online shoppers want to know the details about what they will be buying.
Here are some well-designed product titles:

However, just because you think a certain title is great, that doesn’t mean that your customers agree.
In general, when people are searching for products online, they’re looking for something specific. It may not be a specific brand or model, but they usually have a particular look, feel or color in mind. If they see that information in your title, they’ll be a lot more likely to click and make a purchase.
To figure out what your potential customer are truly looking for, you need to see which search terms are triggering your PLAs.
You can do this by clicking on the Keywords tab and then clicking “Search Terms”, just like you did to find negative keyword opportunities in the last section. This time, however, you won’t want to filter for searches without conversions, you want to look for searches with conversions.
The words people use to find and buy your products can give you a lot of insight into the types of words you should be using in your titles. If people use certain phrases or vocabulary to describe your products, your titles should reflect that so that when people read your titles, they feel like they’ve found exactly what they’re looking for.
Check out the Negative Keywords section above for more info on how to see which search terms are triggering your PLAs.
Product Images
High-quality, relevant product images are always a good idea. However, simply having a beautiful picture doesn’t guarantee that your ads will be noticed. You also need images that stand out in some way.
For example, take a look at these tennis rackets. Which one catches your eye?

The effect is fairly subtle, but the first ad’s gray background sets it apart from the other ads. And, since different draws attention, that’s the ad you notice.
Bid Strategy
Your bid strategy dictates how you want Google to spend that budget you just worked so hard to figure out. Google’s default option asks you a few questions you can use to figure out what strategy you want to use.
There’s no harm in using this approach, but if you really want to get the most out of your campaigns, I recommend clicking “Select a bid strategy directly” during the campaign set up process, which will bring up the following options:
- Manual CPC. For the truly anal retentive, manual CPC gives you full control (or, at least, as close to full control as Google AdWords will give you) over how much you spend on a given keyword.
- Target ROAS. With Target ROAS, you specify what sort of return-on-ad-spend you want from your ads (this works well for many eCommerce companies).
- Maximize clicks. Like the name says, if you select this bidding strategy, Google AdWords will try to get you as many clicks as possible out of your budget. There’s no guarantee that those clicks will turn into sales, but you will get lots of clicks.
- Enhanced CPC. If you have enough sales, enabling this setting will allow AdWords to adjust your bids up and down depending on whether or not Google believes a given search will turn into a click and a sale.
Manual bidding allows you to say “this is as much as I’m going to pay, and that’s it”. The other bidding options, on the other hand, will take your bids and use them a little more creatively to reach very specific results. It gives you less control, but it tells Google AdWords what you’d like to optimize for.
Adjusting Your Bids
Of course, even after you’ve set your initial bids, Google Shopping isn’t exactly “set it and forget it”. After all, when you pay for every click, a simple mistake can cost you an awful lot over time.
As you’re monitoring your campaigns, you may notice different scenarios that could indicate that it’s time to adjust your bid. You can adjust your bids at any time, but here are a few scenarios where you might want to adjust your bids:
- If your CPC is coming in way under budget, but you want to improve your position in the ad display, increase it.
- If your cost-per-sale is too high, but you’re in a top position and you want to stay that way, drop your bid slightly. This can bring the cost-per-sale down while still getting you plenty of clicks.
- If you’re getting a ton of sales, but your profit margin is low, change up your bid.
- If you’re paying for a lot of clicks but not getting sales, try switching up your bid strategy.
Good bid management is an ongoing process. The market is constantly changing and if you aren’t changing your bids in response, you can quickly find that either your ads aren’t showing or you’re paying too much for your clicks.
Campaign Structure
If you really want to make the most of your bid strategy, however, you need an effective campaign structure. And, to effectively structure your campaigns, you need to think about the profit margins of your products.
If you think about it, does it make sense to use the same bids or bid strategy for a $2.00 product and a $2,000 product?
The profit margins for these products are completely different. If you use the same bids for both products, you could either end up spending way too much on clicks for the cheap product or bid way too low for the expensive product.
And yet, at Disruptive, we see this situation all the time.
This is why campaign structure is so important. If you don’t organize your Shopping Campaigns by profit margin or (at least) price, you could be missing out on some of your biggest eCommerce opportunities.
How to Set Up a Margin-Based Campaign Structure
The first step in setting up a true margin-based Google Shopping campaign is to determine the gross profit margin for each of your products. Once you know your gross profit margin, you can use that information to create profit margin-based ad groups in your campaigns.
Alternatively, you can separate your ad groups by price and assume an even margin on all of the products in your account. Obviously, this isn’t the best way to do this, but if you don’t know what your profit margin is, it’s better than nothing.
Once you have decided how you will be sorting your product (by price or by gross profit), you can create price brackets using feed rules.
To create a feed rule, open Google Merchant Center and click on Products in the left-hand sidebar, click “Feeds” in the sidebar that appears, click “Rules” and then click “Create Rule”:

Feed rules allow you to create a custom label based on criteria in the feed. For example, if you use price as your variable, you can set up a feed rule that says, “If ‘price’ is ‘less than’ ‘10’ set ‘Custom label 1’ to ‘$0.01 – $9.99’.

If you set these rules for all price ranges of your products, all products will be given a custom label that you can use to sort your products into their respective brackets in AdWords.
Now that you have a custom label 1 set up with price or profit brackets, you can now use custom label 1 as your ad group!
Using this approach, it usually works best to use a high level category such as product type to organize your campaigns and then your custom margin labels for your ad groups.
Easy Bidding and Optimization
The great thing about margin-based campaign structure is the way it allows you to optimize revenue and profit. For example, if you have products that produce around $5.00 of gross profit and a conversion rate of 10%, you probably don’t want to spend more than $0.50 per click.
Again, this is where the ad group level organization is key. If you have a margin-based campaign structure instead of merely a price-based structure, you will see better results at the profit level.
Remarketing Campaigns
Remarketing (aka, retargeting) is an advertising option in Google AdWords that you can use to deliver targeted ads to people who visited your website…and didn’t convert.
Not everyone who comes to your site is ready to convert today, so remarketing is a great way to stay in front of potential customers while they make up their minds.
How it Works
Google remarketing uses pixels to identify people who have visited your website. A “pixel” is basically a short piece of code you place onto your website (or a specific page on your website).When someone arrives on your site, the pixel drops a cookie onto their browser that tracks them wherever they go online.
For a brief explanation of how remarketing cookies work, check out this video:
If that visitor happens to fall into the 90% of internet traffic that visits websites where Google displays ads, you can bid to have your ads show up.
Like your regular shopping campaigns, remarketing campaigns enter you into a bidding war with the competition, but because your targeting is so specific and remarketing clicks are so cheap, there’s a pretty good chance that your ads will be shown.
Remarketing is great because it’s instantaneous. The moment someone clicks on your PLA and lands on your site, they get “cookied” and can start seeing your ads. In addition, you also know that your target audience was interested enough in your products to click and how recently they visited—all useful information you can use to create an effective remarketing strategy.
Setting Up Google Remarketing
The good news is, it’s quite easy to create a remarketing campaign in AdWords. All you have to do is add the Google remarketing tag (aka, pixel) to your site or upload an email list and create some ads.
If you’ve never done this sort of thing before, this video will walk you through the process:
If all you want to do is remind people about your business with generic display ads, you can just create a remarketing campaign using your remarketing list, make a few ads and upload them to Google AdWords.
However, if you want to have Google show the products a potential customer was looking at on your site in your remarketing ads, things get a bit trickier.
Unlike a standard remarketing campaign, you’ll need to add a customized pixel to every page of your site. This pixel will feed Google AdWords the information it needs to dynamically create specific ads based on what a potential customer viewed on your site.
Here’s a quick overview of how to set up a dynamic remarketing campaign:
Once you’ve added your custom code to every page on your site, the rest is easy. Google AdWords has an ad builder you can use to create a dynamic template for your ads.
With that in place, you can sit back, relax and let Google create custom ads for every potential customer!
While setting all of this up can be a headache, people are more likely to click on an ad for something they’ve already expressed an interest in than a generic ad, so dynamic remarketing ads are worth the effort.
Getting the Most Out of Your Remarketing
Getting your remarketing set up correctly is great, but if you really want your campaigns to deliver awesome results, you have to get inside the head of your target audiences.
Every potential customer is on a buyer journey, and every buyer journey is different. If you want to use remarketing to lead potential customers to the point where they are ready to buy, you need to craft marketing messages that match where your customers currently are—not just where you think they are.
Here are a couple of tactics to consider:
Cut Your Prices
Often, one of the biggest reasons why people aren’t ready to buy is because they aren’t comfortable with the price. 94% of people invest time into comparison shopping, so the odds are that most of your potential customers are hoping they can get what you’re selling for a cheaper price.
Is it any wonder that discounts are one of the most widely used sales tactics?
Discounts get directly at the heart of your potential customers’ pricing concerns. Throw in a little sense of urgency (“Offer Valid Until August 31st”) or exclusivity (“Like Our Page and Get 15% Off”) and you stand a good chance of nudging a potential customer into the “ready to buy” arena.
Cabela’s does an excellent job of this with their remarketing ads. For example, check out this ad:

If pricing on their products is a concern, Cabela’s just made it clear that they are willing to sell a lot of stuff for up to 40% off—as long as you buy soon. So, if price really is important to you, you need to buy now!
Make Things Easy
Another big reason why people aren’t ready to buy is because what you’re selling is just part of a bigger problem they need resolved.
If you buy a new phone…you also buy a cover. You can’t just get your oil changed…you also need your brakes checked (and the tires….and the lights…and the…ad infinitum). If you sign up for cable, you need someone to set it up.
So, if they buy what you’re selling, they have to figure all of the rest of it out, too. That’s a headache—one that can keep them from converting.
Fortunately, remarketing is a great way to address these concerns, especially if you happen to sell the solution(s)!
For example, Maurices’ remarketing ads take a product you showed interest in and show it in combination with a variety of accessories:

Now, instead of having to figure out all the coordinating pieces you need to buy, you can buy a great looking outfit all at once. It makes things easier for you (and it makes more money for Maurices).
If you’re using dynamic remarketing ads, implementing these tactics will take a little clever thinking, but they can both be a good way to get a lot more value out of your Google Shopping campaigns.
Conclusion
Congratulations! You made it! At this point, you should be well on your way to running a successful Google Shopping account.
That being said, this is just the tip of the ecommerce iceberg.
There are still countless things you can (and should) do to get more out of your ecommerce business: landing page testing, conversion rate optimization, Facebook commerce, alternative bidding approaches, mobile commerce optimization and much, much more!
Fortunately, we’ve got you covered. Once you’ve mastered everything in this article, check out some of the links above to take things to the next level!
Or, if you’d like to skip the learning phase and just start earning more money, let me know here or in the comments. I’d love to help you get up and running with Google Shopping!
What do you think of Google Shopping? Have you tried it? What was your experience like? Is there anything you’d add to this article? Leave your thoughts in the comments.
The post Google Shopping Made Easy: The Essential Guide to Selling on Google appeared first on Disruptive Advertising.


