Back in September, I provided three tips on how you could continue to edit link previews when creating a Facebook post. This functionality had otherwise been taken away in an effort to combat fake news.
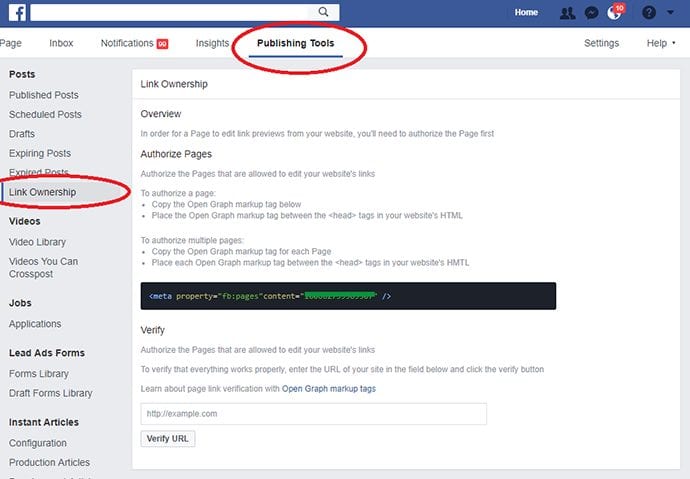
One of the methods I shared with you was claiming link ownership…
At the time, I was frustrated that I didn’t have the ability to claim link ownership. Later I’d find that the path to claim link ownership simply moved.
Let’s take a closer look at how you can once again edit your link previews by using Facebook domain verification.
Editing Link Previews: The Problem
Quick refresher…
Up until late this past summer, Facebook page publishers could edit link thumbnails, titles, and descriptions. But the ability to make those edits was then taken away.

Facebook made this change to prevent bad actors from changing the image thumbnail, title, or description to mislead the reader. Some were taking posts from reputable websites and altering the information to make people think the articles said something they didn’t.
Facebook’s motivation to pull this back was understandable. But what about reputable publishers that simply wanted to make slight adjustments? Maybe the thumbnail image was the wrong dimensions. Maybe there was a typo in the description. Or the description was too long.
Most importantly, what if the publisher owned the content in question?
Domain Verification
Facebook created Domain Verification to allow content owners to overwrite post metadata when publishing content on Facebook.
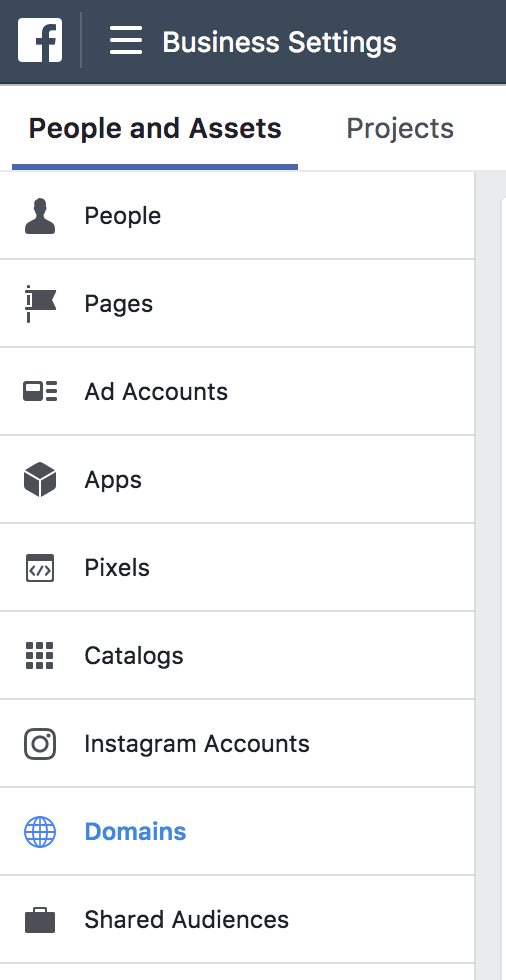
Within Business Manager under People and Assets, you should now see “Domains” on the left side…
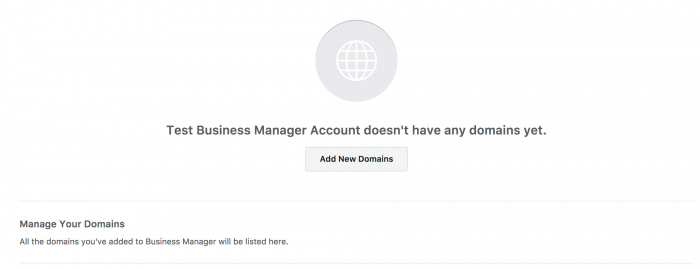
Click the button to Add New Domains…
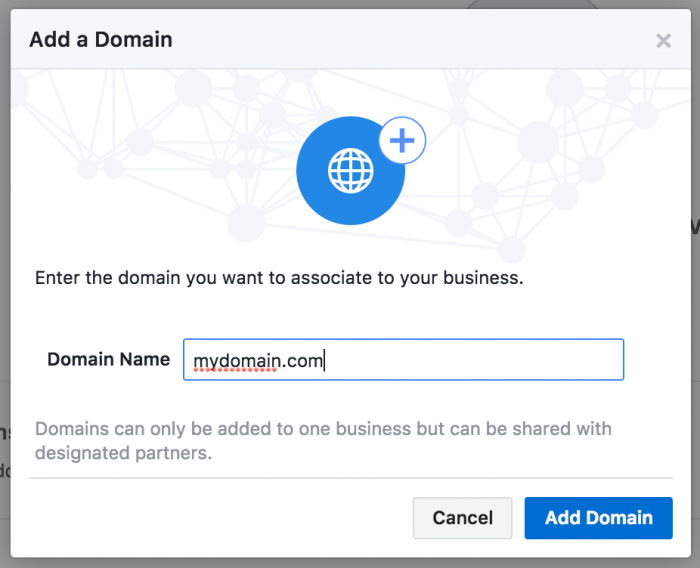
Enter your domain, and click the button to “Add Domain.”
To verify your domain, you’ll need to either add a DNS TXT record or upload an HTML file. If you don’t manage your website, that may sound like Greek. I honestly don’t truly understand it myself. But Facebook provides the specific steps that should help.
For DNS verification…
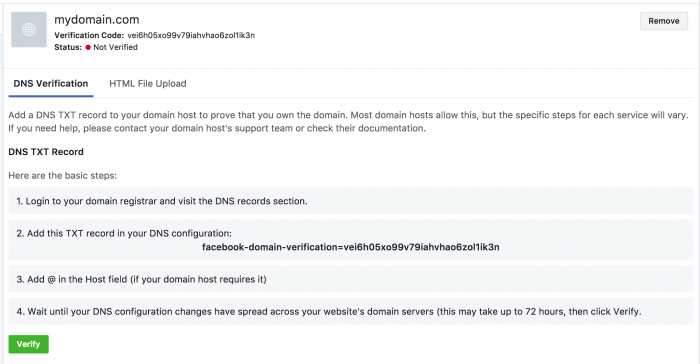
The instructions are above. You’ll want to paste the TXT record that Facebook provides (yours will be different) in your DNS configuration. Then come back to that screen in Business Manager and click the “Verify” button.
You could also use the HTML upload route.
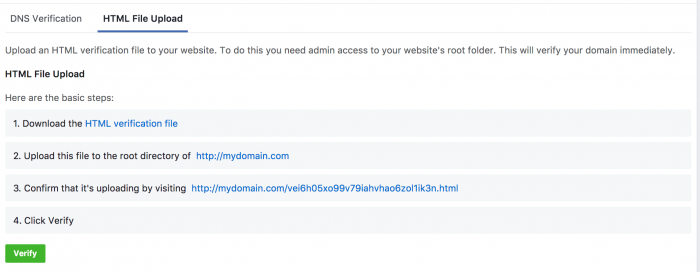
In this case, click the link to download the HTML file that Facebook provides. Then upload that file to the root directory of your website prior to clicking “Verify.”
In my case, this process took only a matter of minutes. I sent the DNS TXT info to my tech person who was able to add that record easily without questions asked. I then verified and was good to go.
Assign Pages
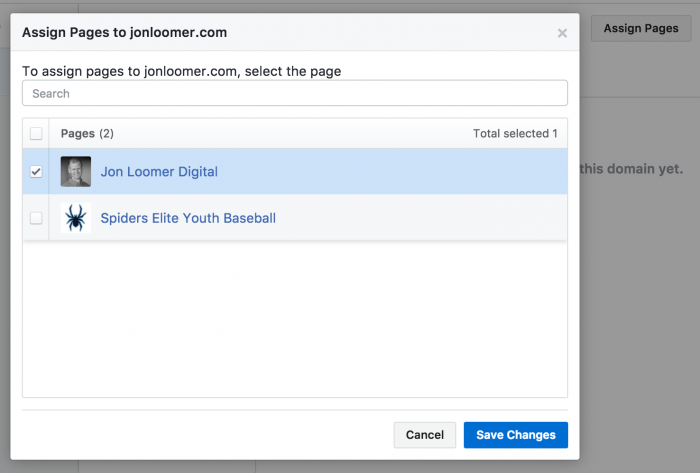
You can assign related pages that have been added to your Business Manager to a verified domain so that they, too, can have editing privileges.
Click the “Assign Pages” button within Domain Verification and select the page that you want to be added.
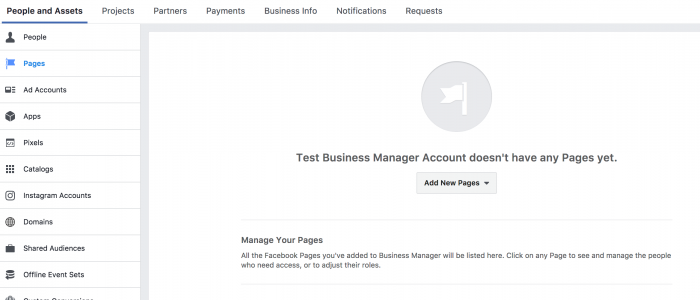
If the page isn’t listed, it first needs to be added to your Business Manager. You’ll do that by selecting “Pages” under People and Assets in your Business Manager and clicking to add a page.
Edit Link Previews
Once your domain is verified and the associated page is connected, you can freely edit link previews!
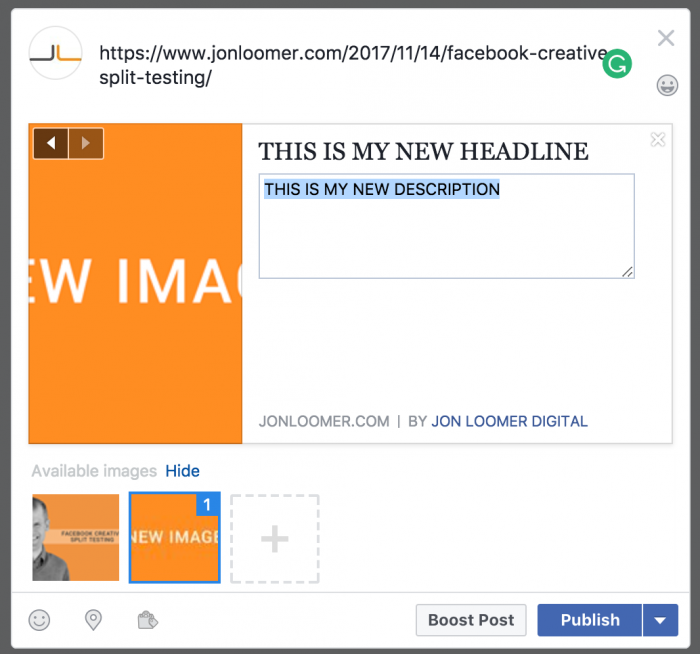
You can edit link thumbnail, title, and description. While the thumbnail will look funny while creating the post, it publishes properly…

Your Turn
Have you been struggling to edit link preview details? Does this help?
Let me know in the comments below!
The post Facebook Domain Verification: Edit Link Previews appeared first on Jon Loomer Digital.


