What is the Google Merchant Center and how does it work? If you want to run Google Shopping ads, these are important questions to answer.
When people use terms like “AdWords” and “Pay-per-click (PPC)”, chances are that images of Google text ads come to mind.
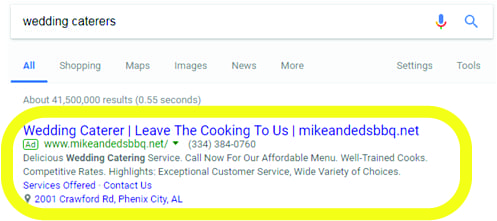
These familiar advertisements offer many companies the chance to be the first search result their target audience sees.
If you run an ecommerce site, however, you may be less interested in the ads under the search bar and more interested in what’s to the right of it.

You’re not alone. Although Google Shopping ads (which also often appear above even text ads, as seen below) apply only to physical, tangible goods, they still manage to account for over half of Google ad spend in the USA,

But how does Google decide which lucky products will be featured?
Well, half of the process is pretty similar to text ad advertising: companies set bids for their products—promising to pay some amount of money for every time an ad gets clicked on.
The other half of the algorithm is somewhat similar to search engine optimization (SEO). If Google knows a lot about your product and thinks it matches somebody’s search intent, your ad is more likely to be the first one they’ll see!
How does Google know so much about your products? That’s where the Google Merchant Center comes in.
The Role of the Merchant Center
Google Merchant Center doesn’t help you manage your shopping ad bidding strategy, create advertising campaigns or track the performance of individual ads. These jobs are really important, but are handled through Google Ads and Analytics.
The Merchant Center does just three things:
- Tells Google you have a product to sell.
- Gives Google the information necessary to create an ad for you.
- Allows you to share additional information so that Google knows which customers are the best fit for your product.
Let me go over each of these in detail.
Creating a Data Feed
Once you’ve signed up for a Merchant Center account, you’ll be prompted to create a “data feed.” This is essentially a product inventory.

For each feed you create, Google will ask you some basic targeting questions like what area of the world you are trying to sell in. This is important because it will determine not only where your ads are seen, but the language they use and the units for your prices.
In other words, if you create a feed targeting Japan, you’d better remember that calling the price “100” means your product will sell for 100 yen (about $1), not 100 dollars.
If you’re having trouble visualizing this process, check out Google’s instructional video on the subject:
Not too difficult, right?
Required Product Information
Once you’ve got a data feed created, you need to fill it with product information.
This information can be submitted several different ways, but by far the simplest approach is to use the ready-made Google Sheet form that Merchant Center provides you. It will look something like this:

Each row of the spreadsheet represents a different product and each column represents an attribute of that product. Don’t change the column headers, but delete the example products and start filling in your own information.
In order to create an ad, Google only requires that a few columns have information in them.
Inputting your product data can be frustrating since Google will reject your sheet if things aren’t formatted right, so let me walk you through what goes in each required column.
ID
This is a unique identifier for your product. It isn’t the product name, it’s usually just a code of numbers and/or letters that serve to identify the item like a digital bar code.
If you’ve ever sold anything in volume, then chances are that you’re already using an ID system to keep track of your inventory, so go ahead and input whatever codes you already have assigned to your products.
Title
This is a critical field. Whatever you put in here is the headline your customers will see below your product picture.

The right title is important both to help Google’s algorithm decide to display your ad and to help customers decide to click it. There’s a whole art to optimizing product titles, but that’s a story for another day.
Description
Your title is allowed only 150 characters, but the description field gives you up to 5,000 to elaborate on the appearance and features of your product. Just like all product information, Google takes this information into account when choosing whether or not to show your ad, so it’s helpful to prove you have what people want by putting probable customer search terms in the description.
The description doesn’t show up in the small tile ad format, but if people click on a tile in Google Shopping they’ll see a larger version of the ad which includes the description:

You can take multiple approaches to writing your description. The one in the above ad is basically just a list of keywords. Not much of a page-turner, but it gets the job done.

On the other hand, this description goes to the opposite extreme. It uses long sentences which provide a lot of emotional context…but not a lot of information.
Availability
This is pretty straightforward: Do you currently have the product available for purchase or not?
The main mistake here is getting too wordy. Google only accepts three possible terms in this column: “in stock,” “out of stock” and “preorder.” Put anything else in and you’ll cause an error.
Price
This is another simple one. You can put units for your product’s price if you want (“100 USD” for one hundred US dollars, for example) or you can just input a numeric value and just let Google assume the units based on your target country.
Like I mentioned before, it’s important here to keep your units consistent. You’ll cause an error if you type “100 USD” in this field but you’re targeting Canada, where Canadian dollars (CAD) are used.
Link
This is the URL of the product’s landing page on your website. If a customer clicks on your Google Shopping ad, this is where they’ll be taken.

Make sure that the information and pictures on your landing page match what’s in your ad or your customers will feel confused and betrayed when they get to your site and will be less likely to buy.
Image Link
This is simply the URL of the main image you want attached to your ad.

Much like the title section, a well-chosen picture makes a big difference in whether your ads get clicked or not. There’s a lot to learn about this subject, but it’s outside the scope of this article.
GTIN/MTN/Identifier_exists
The last thing all products on Merchant Center must have is a universal product identifier of some sort.
If you’re reselling something you bought from a third-party manufacturer, then chances are the product has a Global Trade Item Number (GTIN). This is an identifying code which stays the same no matter who is selling the item.
There are many types of GTIN. A familiar example is the ISBN used to identify books. Libraries might have their own systems for grouping and filing volumes, but take a book’s ISBN to any library in the world (or the internet for that matter) and it will match to the same book every time.
This information allows Google to compare your product, including its price and its keyword bids, against all the other identical products being sold through the Merchant Center.

This is the information Google uses to say that the car jack above is the best price from among 20+ stores…

…While that this one is only sold by Harbor Freight Tools.
If your product doesn’t have a GTIN (for example, if it’s only a small part used to make other products), then it may have an MPN (Manufacturer Part Number). In this case you’ll look up the number the same basic way you look up a GTIN, but you’ll input it under the MPN column in your data feed.
Finally, you may be selling items that have neither a GTIN nor an MPN.

This headdress, for example, is hand-made by an Etsy seller who listed their item on Merchant Center for additional exposure, but who almost certainly does not have a universal identifying number for the custom item.
In this case, the seller would pass up the GTIN and MPN columns on the data feed and instead skip to “Identifier_exists.” Putting the answer “no” in this column lets Google know the product is not found elsewhere on the web.
Other Required Information
The eight categories listed above must be filled in for any and all products on the Merchant center, but depending on the type of product additional information may be required.
I won’t go over all of these in detail, but I’ll list which product types you need more info for, and if you see your stuff on the list then check out Google’s Product Data Specification Sheet for more details.

Additional Information
You have to get the required information squared away before Merchant Center will even accept your products, but if you want to go above and beyond you can add extra info for the benefit of your customers (and the Google Algorithm).
Extra data you can provide includes things like:
- Sale prices and dates
- Shipping dimensions and minimum handling time
- Size categories for apparel items
- Additional product images
- Energy efficiency class
- General product categories
- Loyalty points
- Cost of production
- Date ranges when your products will be available
Fleshing out your product data like this can help you target your customers better, improve your analytics and generate extra interest through special promotions.
Feed Rules and Supplemental Feeds
It’s probably obvious by now that setting up a high quality data feed (inventory) is incredibly important…but it can also take quite a bit of effort.
So what if you have to make changes to your data? Do you have to start from scratch and pour over your thousands of little spreadsheet cells changing the data points one by one?
Thankfully, this isn’t the case. There are two ways to make sweeping adjustments to a data feed in a comparatively efficient manner.
1. Feed Rules
The first is through feed rules. These rules work sort of like the “find and replace” function on a word processing program. Once you have a functional data feed you can create rules through Merchant Center that will identify products that fulfill certain conditions and add or modify data in all of them simultaneously.

For example, if you wanted to have a sale on all items of a certain brand, rather than inputting the sale price and dates by hand for each item, you could set up a rule which would automatically populate this data for all products with a certain value in the “brand” category.
Supplemental Feeds
The other approach is to create supplemental feeds. Introduced in 2017, this feature allows you to attach whole new spreadsheets to you data feeds to update the data en masse.
Supplemental feeds aren’t used for creating new products, but so long as they contain the IDs for the products already in your primary feed, Merchant Center will automatically add the information from the new spreadsheet to the existing products without requiring you to lose any of your original data values.
One nice feature of supplemental feeds is that they allow you to target multiple countries without having to duplicate your original spreadsheet into numerous primary feeds. This can save you a lot of time and also makes your Merchant Center less cluttered.
Summary
It may take a while to get the hang of the rules and formats required by Google Merchant Center, but its role is beautifully simple—it is a basic, universal template that transforms your products into bytes and bits for the whole world to peruse.
A skillfully set-up Merchant Center will streamline and simplify your whole Google Shopping seller experience and will form the essential foundation for the rest of your marketing efforts.
If you have any questions while getting started with Merchant Center, don’t hesitate to ask!
The post Google Merchant Center Guide: Get Your Products on Google Shopping appeared first on Disruptive Advertising.


