
Why Use an Instagram Grid Layout Tool?
Instagram has always been a visual-first platform. Unlike Facebook, Instagram users are probably more likely to follow your account if they see a curated grid than if it’s a seemingly disconnected assortment of jumbled images.
It’s crucial to tell a story and give your profile a visual voice so people know what to expect from your content. It also helps send a clear message of what you’re trying to achieve with your Instagram such as selling products or services, sending traffic to your blog or website, driving foot traffic to your store, building a community of like-minded individuals, or simply building authority in a certain category or field.
The other benefit of a curated grid is that a consistent color theme or palette can be the thread that connects your posts, even if the content is completely unrelated. By linking your posts with a color theme or palette, you can cover multiple content types and topics, yet still have a grid that remains connected through visual cues.
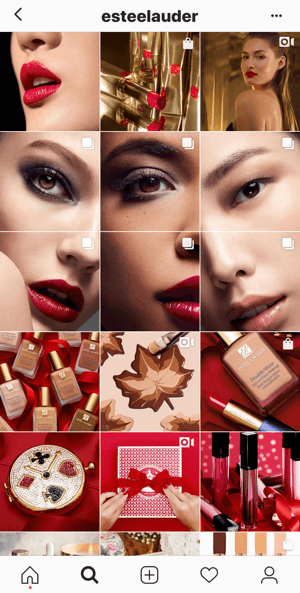
Pro Tip: Try something different by splitting images across a number of tiles to create impact with your profile. Play with color, tone, and style. Splitting an image into nine tiles can make a strong visual impact, which is ideal for new product launches or highlighting an important announcement.
Whether you want to use a grid splitting tool or not, the following grid planning tools will help you map out your individual posts and create a cohesive Instagram profile for optimal impact. You can use these tools to ensure that your split images will mesh with the rest of your content or simply check that an individual post blends seamlessly with the rest of your content.
#1: Planoly
Planoly (iOS and Android) is one of the most popular Instagram grid planning tools due to its intuitive app layout and ease of use. It’s also conveniently available on both mobile and desktop if you need to upload or write copy from either device.
This tool lets you manage and create your hashtags, plan and schedule posts and stories, and access analytics data for your account. The free version has very basic data but as the plan price increases, the data becomes more detailed and comprehensive.
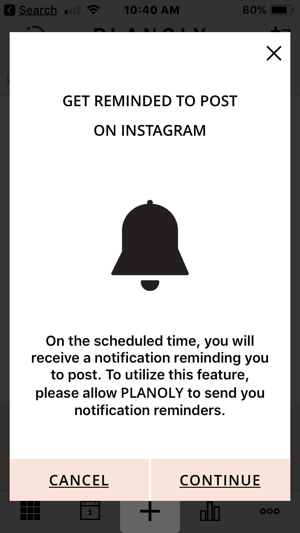
It also has a fantastic feature that allows you to split posts directly so no other tools are necessary. You can then schedule straight from the app and won’t need to worry about the order of the posts. Note that the “schedule” function won’t schedule automatically; rather, it sends a posting reminder to your phone at the time of posting.
On desktop, Planoly has a handy calendar tool that helps you plan new posts.
One downside is that the mobile app can be a little slow to upload, and you can only upload 30 images a month with the free version.
Cost: Free. For extra features, upgrade to one of the paid plans, which start at $9/month. Paid plans let you add multiple users, access more analytics data, and upload more than 30 images per month.
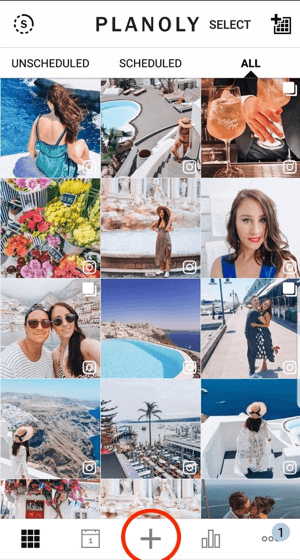
To use this tool, first download the app from the App Store or the Google Play Store. Create an account and connect your Instagram account. When you log in initially, you’ll see your normal Instagram profile displayed in the grid format.
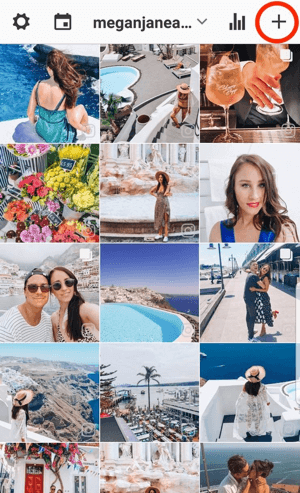
To start adding posts, tap the + symbol at the bottom of the app and select your image.
Next, you’re taken to the upload screen.
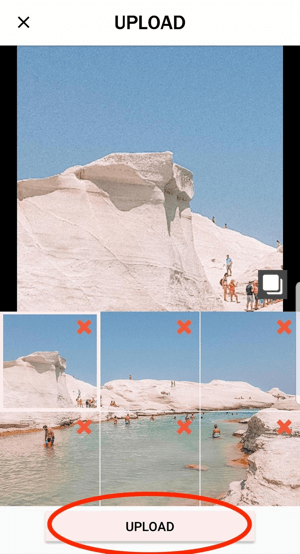
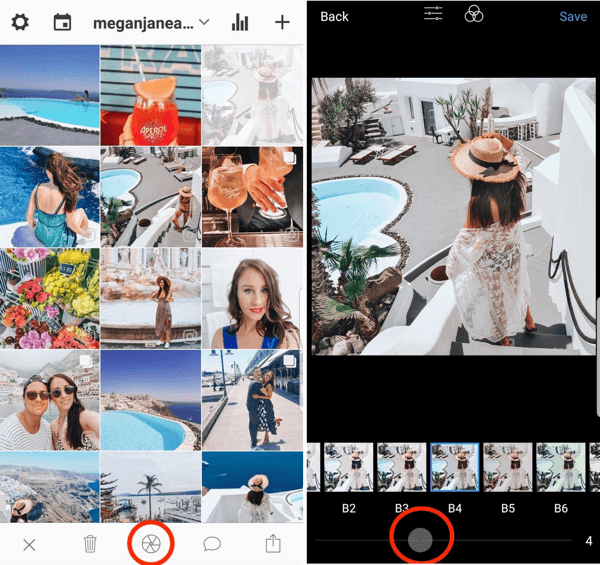
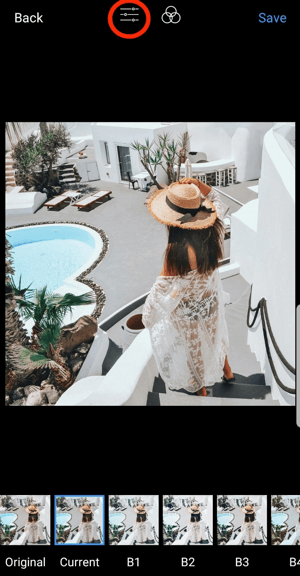
What’s great about Planoly is that you can split your image into multiple posts directly. To do this, tap the grid icon at the bottom right of the image you’re uploading.

From the pop-up menu, choose which format you’d like the posts split into. Then tap Split at the bottom of the screen.
If the split preview looks okay, tap Upload to add the image (now multiple posts) to your account.
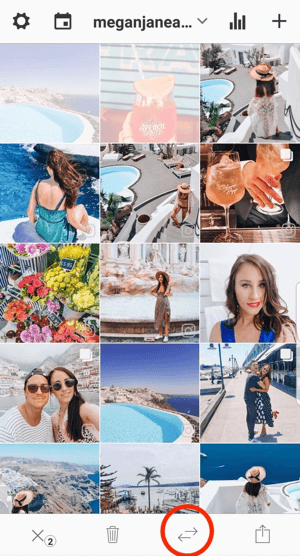
Continue adding images until you’re happy with how the layout looks. If you need to delete an image, tap the post and then tap the trash icon at the top right.
If you want to move a post, tap and hold the image and drag it to swap places with another image.
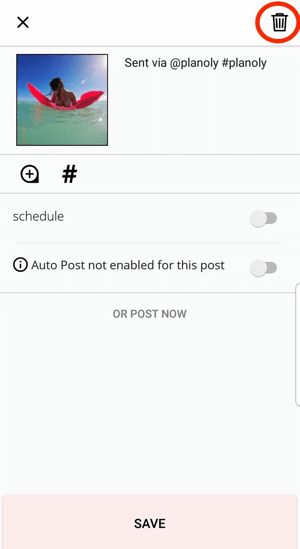
When you’re happy with your grid, you can schedule your post. Tap your post, add your caption, and tap the Schedule option. In the calendar, select a date and time and tap OK.
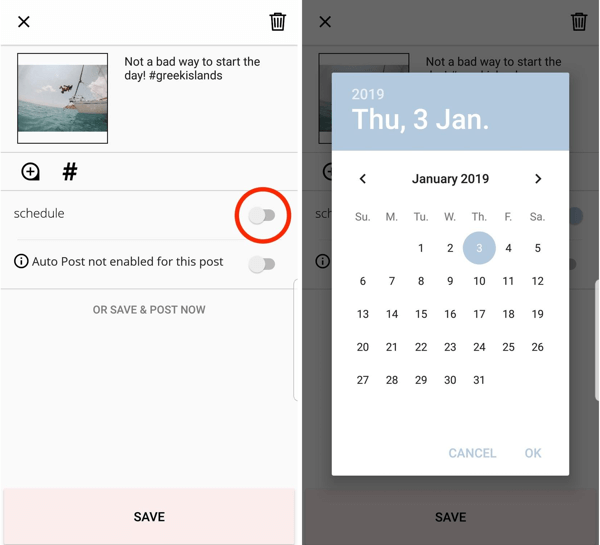
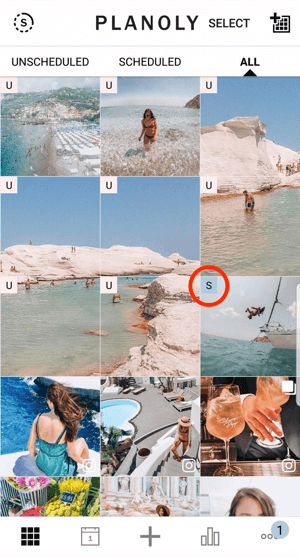
If everything looks okay, tap Save. You’ll notice that the post is now marked as scheduled, and it has a date and time attributed. It will also be marked with an “S” on your grid back on the main screen.
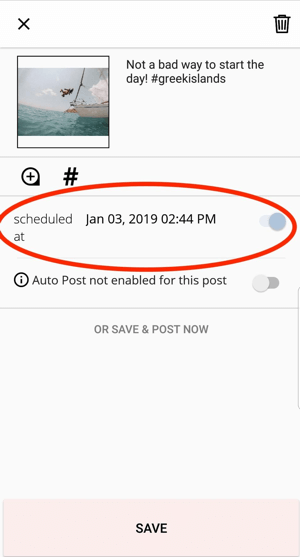
If you choose to schedule posts through the app, the order of your posts will change on the grid in Planoly until you schedule all of the other posts.
For example, one post is scheduled below (marked with an “S”) but not the others, so the order has changed accordingly:
Pro Tip: Create an alternative (non-branded) account to test content before you post it on your main account page. If you only have a few hundred followers, it may be easier to spot trends and patterns when testing content. Once tested, post the same (or similar) content according to what performed the best in your testing.
#2: Preview App
Preview App (iOS and Android) is another popular grid planning tool. Like Planoly, it has an intuitive interface and allows you to switch and rearrange planned posts with the click of a button. It also has a built-in editing tool that’s great for simple edits, particularly if you feel the tone of an image is slightly different from the other content and want to modify it.
What’s great about Preview is that it lets you upload an unlimited number of images for free, so if you’re working with a large number of images, it’s the perfect tool. The free version contains basic analytics, and you can purchase additional filter packages or upgrade to paid versions of the app.
Cost: Free with no limit on uploads; the paid plans start at $7.99/month for full analytics, hashtag analytics, and full filter packs.
To get started, first download the app from the App Store or Google Play Store. Log in and connect your Instagram account. Once you log in, your grid will appear. To start adding images, tap the + symbol at the top-right corner of the screen.
Now select and upload as many images as you like.
To change the order of the images, click the two images you’d like to swap. They should appear white when you select them (as shown below). At the bottom of the screen, tap the icon with the two arrows and the images will swap places.
To edit an image, tap the image to select it (again, it should turn white as before) and then tap the wheel icon at the bottom of the screen. Select whichever filter you prefer and drag the slider at the bottom to increase or decrease the effect. Then tap Save to save your changes.
At the top of the screen, tap the settings bar to open more advanced editing settings, should you need to edit, crop, add overlays, or remove blemishes. The editing function is a key reason why the Preview app is such a strong grid layout tool.
When you’re finished editing the image, tap Done and then tap Save (both options are at the top right). If you haven’t edited the image beyond simply adding a filter, you can go straight to the Save function.
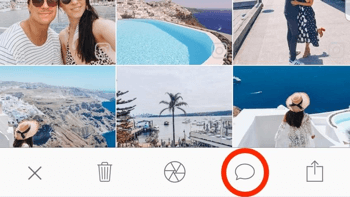
From here, you can add a caption and schedule the post to your Instagram account. To add a caption, simply tap on the image and tap the speech bubble icon at the bottom.
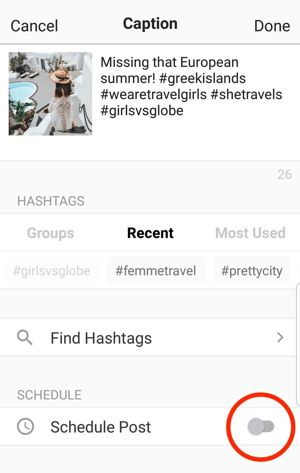
A helpful extra function with this app is the ability to search for hashtags. Tap Find Hashtags on the scheduling screen to perform a search. Scroll through the suggestions and find a set of hashtags that fits your post. Then click off the screen to go back to scheduling your post.

To add groups of hashtags you’ve previously saved, tap Groups and make your selection.
Once you’ve selected your hashtags, tap Schedule Post at the bottom of the screen. Add your preferred date and time and tap OK. Then tap Done.
Preview, like Planoly, will send you a reminder to post rather than automatically posting to your account.
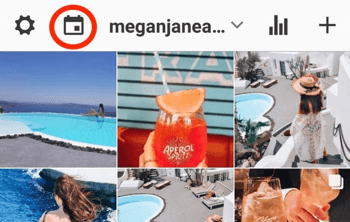
If you go to your calendar (tap the icon at the top left of the main grid screen), you can see the post scheduled in the calendar.
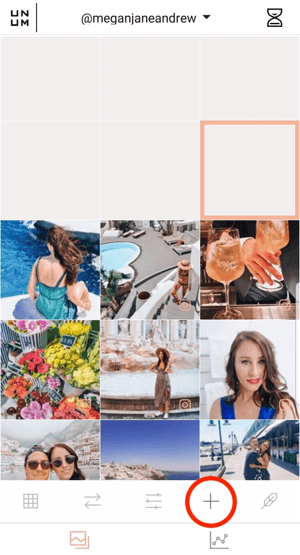
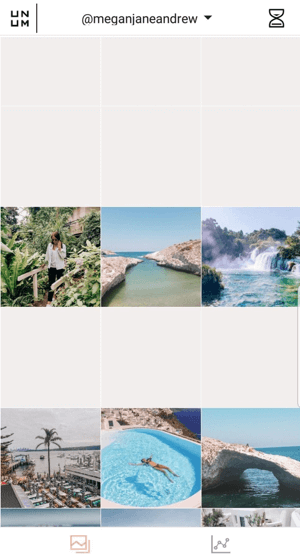
#3: UNUM
UNUM (iOS and Android) gained in popularity before Instagram created the archive feature because it allows users to “hide” posts and see what the grid would look like if certain posts were deleted. It’s still a helpful app though, with its simple drag-and-drop feature and the ability to toggle posts to see how they fit with your other content. You can also perform basic edits or cropping.
It can be a little slow, particularly when uploading, and the schedule function is also a little clunky. But on the plus side, it’s simple to use. If you’re not using the app for scheduling, it’s a great option. And unlike the other apps on this list, UNUM lets you upload 500 images per month for free (with 18 tile planning spaces).
Cost: Free; the paid plans start at $4.99/month and offer more total grids, deeper analytics, and unlimited uploads.
To get started, download the app from the App Store or the Google Play Store. Log in and connect your Instagram account.
To upload one or multiple images at once, scroll up, select the square where you want to add your image, choose your image, and then tap Done.
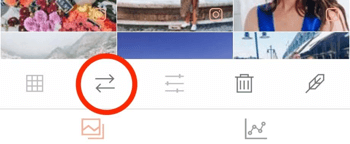
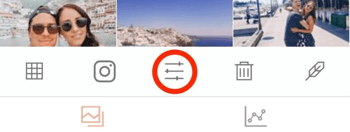
Once you’ve uploaded all of your images to the app, you can rearrange them by swapping two images at a time. To do this, select two images and then tap the double arrow icon at the bottom to swap them.
To use the editing function, select an image and tap the edit icon at the bottom center of the screen. This allows you to do basic edits.
If you have other posts that you want to keep on hold for future use, there’s plenty of space at the top. Simply upload them to the planning space for future use.
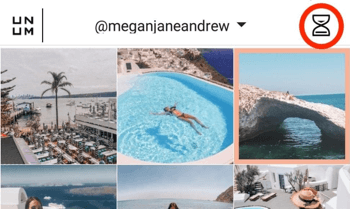
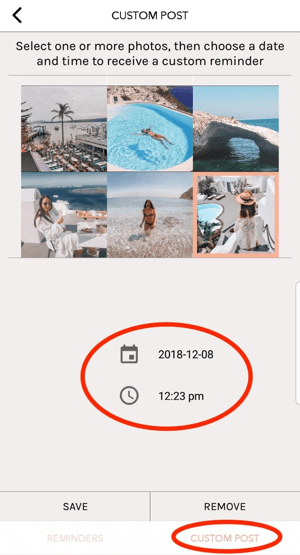
To set a posting reminder, tap the hourglass symbol at the top right of the screen.
Then tap Custom Post at the bottom of the screen. Tap to select one of your planned posts and choose your preferred date and time. Tap Save when you’re done.
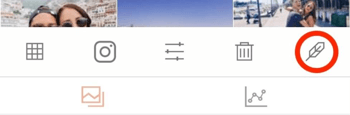
The clunky part lies in adding the caption. You have to go back to the main grid, tap on your post, and tap the feather tool at the bottom right. Then add your caption and tap Save.
#4: Plann
Plann (iOS and Android) is similar to Planoly. It features a limited number of uploads per month (30) and basic editing capabilities, and allows you to plan your grid, curate your grid, and schedule posts with a push notification.
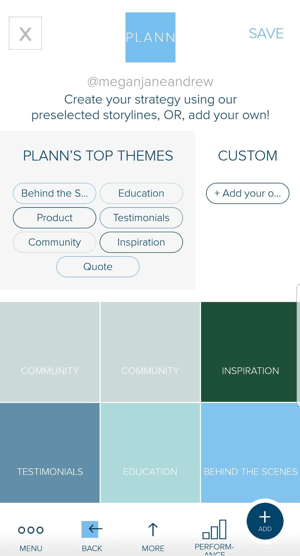
Cost: Free; if you upgrade to the most basic paid version (currently $4/month), you get plenty of extra features such as analytics and a “strategy” plan, which lets you map out the different styles of posts you want to add and even add color-coded placeholders.
For a small cost, you get an all-in-one tool with a little more guidance. You can find out the best time to post and view your color palette, which is helpful for identifying ongoing or future themes. It has a helpful goal-setting function where you can track trends and add a weekly focus.
In terms of analytics, the $4/month version shows your top posts, best times to post, follower growth, and best-performing hashtags. Like some of the other apps, you can also save sets of hashtags and plan, save, and schedule stories.
On the flipside, Plann is not as intuitive as some of the other apps and it’s not as easy to move images around. There’s also no calendar function outside of the grid.
To use Plann, first download the app from the App Store or the Google Play Store. Then log inand connect your Instagram account. Tap Continue to enter the main grid screen.
To upload an image, tap the + symbol at the top-right corner of the screen.

On the Add Media screen, tap Device and select the images you want to upload.
To rearrange the images you’ve added, click and hold an image, and drag left or right to move it.
To create a post, tap the image and add a caption. Tap the leftmost icon at the bottom of the screen to access editing tools.
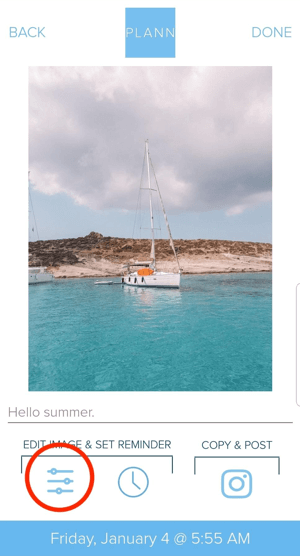
To set a posting reminder, tap the clock symbol and add your date and time, or tap the Instagram icon to post directly. Your caption will be saved to post directly to your profile or Stories.
Bonus Tool: Split Your Image
Pine Tools Split Image on desktop is an easy tool to split an image for Instagram. You can split tiles into 2, 3, 4, 6, 8, or 9 images.
Keep in mind that posting 4, 6, or 8 images in a 2 x 2, 2 x 3, or 2 x 4 format means you need to coordinate with your other content (whatever will make up the images in the third column) and post it all at the same time, which can be difficult and time-consuming. Some users also have smaller screens, so a 2 x 4 post may not have the same effect because the image may run past the size of their screen.
I recommend that you plan split posts far in advance, and if you schedule them, monitor your split posts closely when they’re due to go live.
To use this tool, go to the tool’s home page and click Choose File. Then select the image you want to upload.
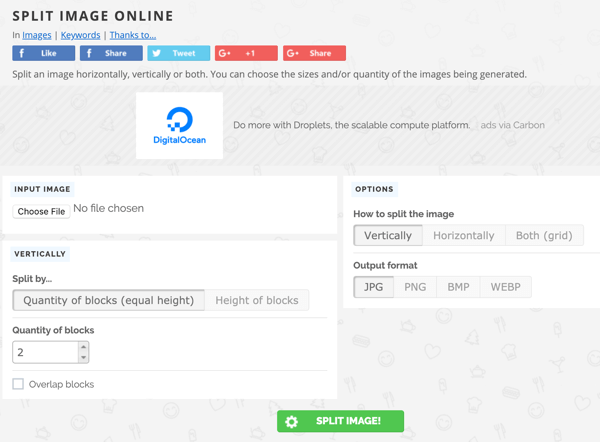
From here, decide how you’d like to split your image: vertically, horizontally, or both ways. For maximum impact, split both ways.
Then choose the number of rows and columns you’d like, select the file type you need, and click Split. The images will be downloaded into separate files with each image labeled in order for posting.
Before you upload the images to Instagram, make sure you look at each image individually. Watch for split text on one image spelling out a word you didn’t intend, or split images that create a strange look individually.
Conclusion
It’s important to have a clear vision for your Instagram content. Choose one theme or filter from the start and stick with it. Is your palette warm and sunny? Dark and moody? Woody and masculine? Tropical? Does it have a vintage feel, or is it more modern? Changing styles and filters too much creates a messy and inconsistent look, which may be confusing to potential followers.
Use a balanced mix of images consistent in theme, color, style, and subject. For example, if your Instagram account represents a swimwear brand, use images of people mixed in with location shots of beaches, close-ups of products, and photos of models wearing your swimwear pieces. Post a combination of close-ups, extreme close-ups and larger, more detailed scenes to ensure that not every image is busy.
If you follow these suggestions, you should be well on your way to developing a cohesive and consistent visual aesthetic on this visual-first platform.
What do you think? Which of these Instagram tools will you try first? Have you experimented with splitting images in your Instagram posts? Please share your thoughts in the comments below.


